
 |
!! Please select country!!
Created: 29 Jan 2010
Last Updated: 22 Sep 2013
|
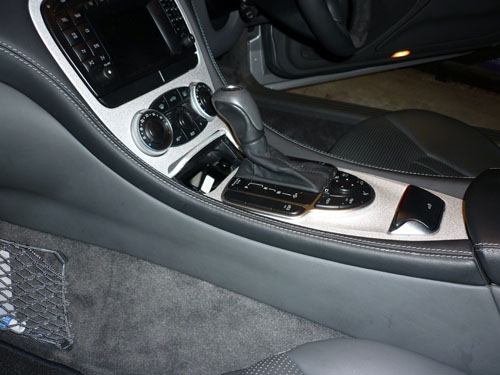
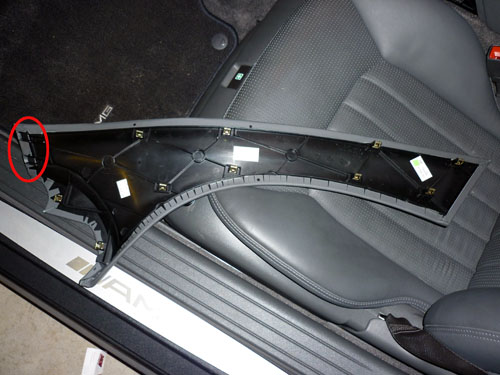
You need to firstly remove the wood (or metal) centre console trim, The pictures below are for the pre MY2005 facelift, however the procedure is the same on newer cars except that you must open the cupholders, remove the front piece and close them again. On MY2009 cars to remove the COMAND you must also remove the airvents above to access the screws that hold the top of the COMAND unit. Firstly remove the trim either side of the centre console. Lower the seats to the lowest and most rearward position to give best access, and then remove the trim which just pulls off from the centre console and then slides out from the dashboard. Put your fingers under the trim (above the carpet) in the middle and pull gently to release the middle clips, work your way backwards until all the clips are released and then pull the trim out (pulling to the rear of the car away from the dashboard). Here is a picture of the trim removed, circled are the hooks that hook into the dashboard, you can also see all the clips that hold the trim to the centre console and the other two metal clips that lock it into the dashboard.
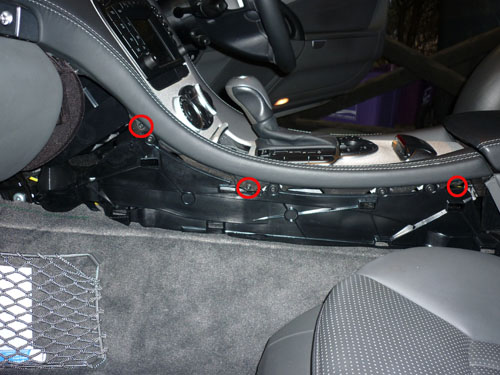
Now unscrew the 3x TORX TX20 screws on each side that hold the wood/metal trim to the centre console. The screws are quite long and the screw at the rear end is recessed so a torch / flash-light is useful.
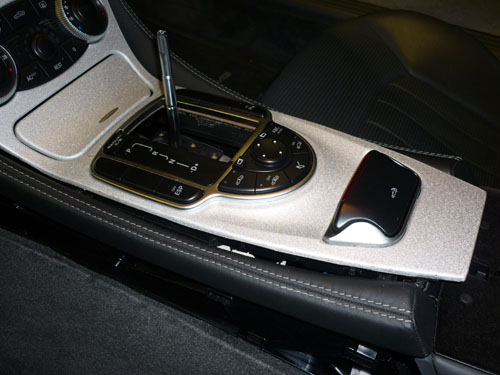
Once that is removed, remove the gear selector knob - move the gear selector to N (ensure the parking break is on and the wheels are chocked), pull up the leather gaitor, rotate the knurled nut 90 degress anti-clockwise and pull the gear knob upward. If the car has keyless go you must not twist the gear knob or you may break the pins from the start/stop switch that plug into the top of the gear selector shaft. On non-keyless-go cars, twisting the knob as you pull upward helps. On MY2005 onward cars, open the cupholders and remove the front panels from the cupholders and close them again - this allows the two tabs at the top of the centre console trim (that cover the cupholder screws) to come forward without hitting the cupholders. Ensure that the ash-tray is closed (remove the insert), and you can then pull up the trim, from the rear, by pulling on it through the hole left by the gaitor.
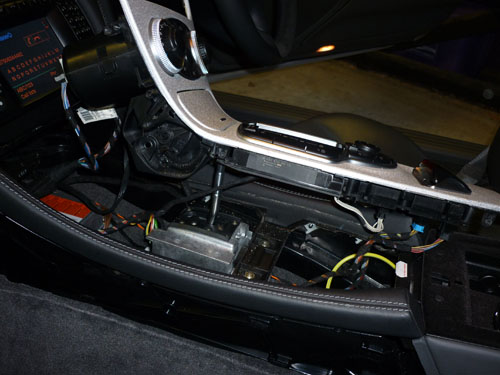
Pull the whole trim out further by pulling it away from the audio/COMAND unit, the ash-tray does intefere with the gear selector surround, so take care.
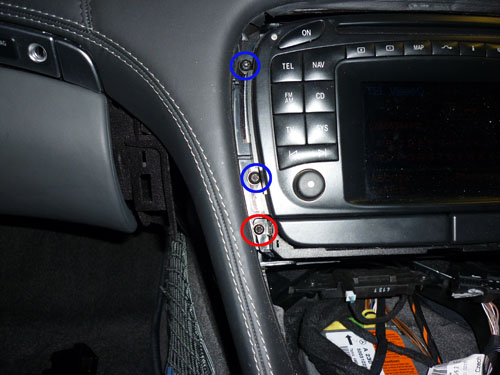
Once the whole trim is released you should disconnect the 3 cables (one pulls straight out, two are on rotating clips) from the airconditioning unit, the cigarette lighter power (pulls out at 90 degress to the body of the cigarette lighter) and the purple connector on the gearbox mode selector (W/S, W/S/M button). Also disconnect the two plugs to the roof / mirror selector switch if you want to remove the whole trim, but you can just lay it to the side if just removing the audio system. You will now see one screw (red in picture below) each side of the cup-holder which hold the cupholder to the frame the COMAND sits it. On MY2002-2004 cars you will also see two screws (blue) each side of the audio unit which you should undo and remove to remove the audio unit.
On MY2005 - MY2008 once the cupholders are removed look in through the exposed slot and there are two plastic lumps on a rail at the rear that hold the back of the COMAND in place. If you push on these lumps (with a wedge or screwdriver) it it allows the back of the COMAND to drop down. The front can then drop down and the whole unit can be removed. On MY2009 onward COMAND is held in by the cupholder screws and there are two additional screws that screw into the top of the COMAND. To access these screws the vents above COMAND must be removed. This is done by removing the speaker grill above them exposing two screws, undo those screws. There are then two hook catches (one at the bottom of each vent) which can be seen through the vents - these are best released with the Mercedes pulling hook tool which will release and pull the whole vent forward. You can then access the screws that hold the front of the COMAND in from above. When re-assembling ensure that the wiring does not get caught in the ash-tray mechanism, and that all wires are plugged back in again.
7/Dec/2010 V1.2 expand info on removal of MY05-MY08 COMAND further. |
If you found this information useful, please support the site by making a donation via Paypal. Any amount at all helps me improve the information on the site. |
Comand Online Ltd - the place to buy Mercedes iPod kits, phone kits, retrofit parts & map disks MY AUTOCAR - THE BEST PLACE TO TALK CARS |