
 |
!! Please select country!!
Created: 25 Jun 2009
|
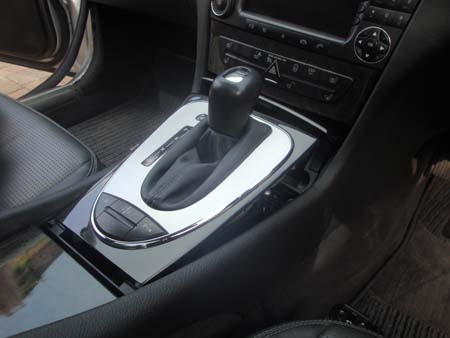
Firstly remove the wooden surround panel around the gearstick. On the W211 E class you just pull up the front edge (it is hooked in at the rear edge), and the whole panel comes up.
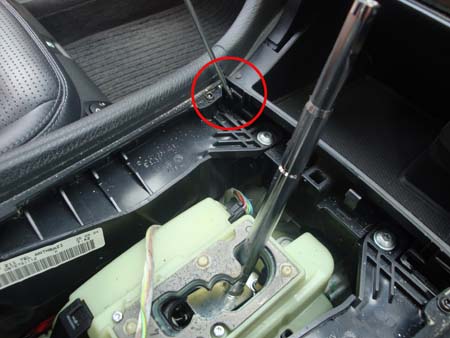
On the W219 CLS it is easier to leave the wood surround in place and pull up the metal surround of the actual gear lever, then you can reach through the hole and push the catches (you can feel one at each end of the front edge of the trim) whilst pulling the wood trim up from the front. Once the panel is pulled up, you can see a knurled plastic nut at the bottom of the gearknob itself, rotate anti-clockwise, unplug all the wires connected to the panel and then pull the gearknob upwards and remove the panel. Now you need to release the catches that hold the ashtray in place, there are two and they clip slightly forward using a screwdriver, whist applying pressure with the screwdriver pull the ashtray upward.
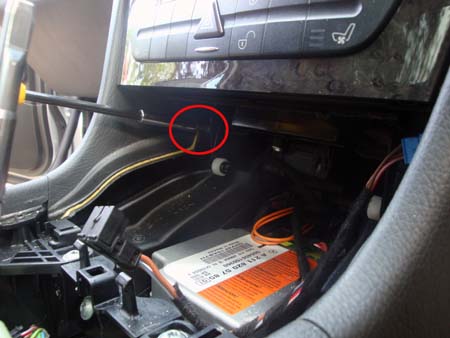
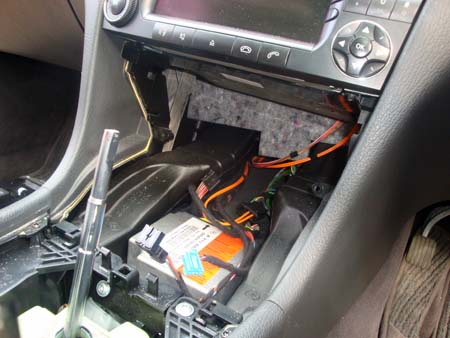
Unplug the blue ashtray light connector and the black cigarette lighter power connector which pulls out at right angles to the body of the cigarette lighter (i.e from the side of the end of the cigarette lighter). The black connector in the picture below is the cigarette lighter power and the blue connector is the ashtray lamp connector. Now remove the 2 screws that hold the lower control panel (the one with the CD changer compartment) in place: -
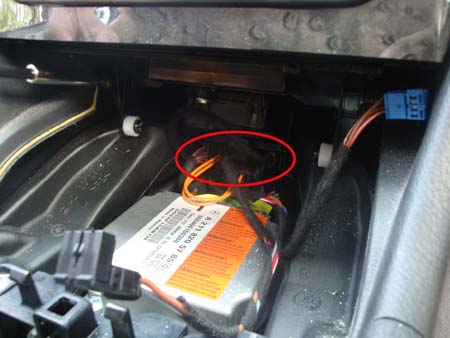
Unclip the connectors, on cars with no CD changer there is just one connector (the one with lots of wires on the left of the picture below), on cars with CD changer there is also a fibre optic connector (latch on the left of the connector) and the CD power connector (3 wires) to the right of it. Note that if you want to install or remove the CD changer, you should open the CD changer compartment first and then remove the LCP connector (the one on the left) so that it is open for you to work on it.
Now you can remove the whole section, it is easiest to move the gear stick to Drive position when removing it.
Now undo the two screws that go up into the base of the Audio unit, just turn them until they stop turning.
Now you can just slide out the Audio / COMAND unit and disconnect the connections at the rear. Reassembly is just the reverse of removal, remember to test that the CD changer compartment opens and closes before you tighten the screws up - in order for that to work the AGW needs to be connected (which you may have disconnected if you are fitting COMAND) |

If you found this information useful, please support the site by making a donation via Paypal. Any amount at all helps me improve the information on the site. |
Comand Online Ltd - the place to buy Mercedes iPod kits, phone kits, retrofit parts & map disks MY AUTOCAR - THE BEST PLACE TO TALK CARS |