
 |
!! Please select country!!
Created: 25 Jun 2009
Last Updated: 22 Sep 2013
|
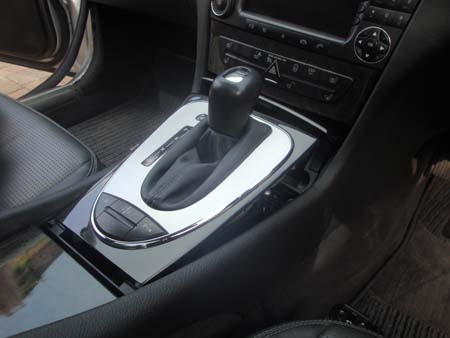
This document describes how to retrofit an iPod kit to a pre Model Year 2009 Mercedes E Class (W211) or Mercedes CLS Class (W219) vehicle. For the MY2009 Mercedes E / CLS (i.e those with Hard Disk based COMAND) look at the document on this site about retrofitting COMAND in an A/B/C class, and look at the document telling you how to remove the COMAND unit on a W211. The vehicle must have the COMAND colour satnav system, as that is the only system in the Mercedes E class or Mercedes CLS class that has the aux input necessary to connect the iPod. Parts Needed: W211/W219 iPod kit. Mercedes part number B67824239 available here. Tools needed: TX25 TORX driver Installation All the photos in this document are from a RIght Hand Drive, W211 E class. Installation on Right Hand Drive cars is marginally easier as the wiring always goes down the left hand side of the car to the boot (trunk) of the car and as the glovebox is also on the left there is a little less to dismantle. a) Firstly remove the COMAND unit. Firstly remove the wooden surround panel around the gearstick. On the W211 E class you just pull up the front edge (it is hooked in at the rear edge), and the whole panel comes up.
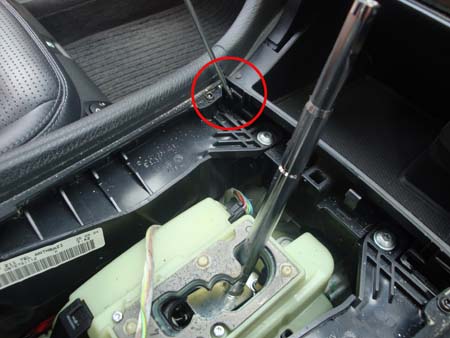
On the W219 CLS it is easier to leave the wood surround in place and pull up the metal surround of the actual gear lever, then you can reach through the hole and push the catches (you can feel one at each end of the front edge of the trim) whilst pulling the wood trim up from the front. Once the panel is pulled up, you can see a knurled plastic nut at the bottom of the gearknob itself, rotate anti-clockwise, unplug all the wires connected to the panel and then pull the gearknob upwards and remove the panel. Now you need to release the catches that hold the ashtray in place, there are two and they clip slightly forward using a screwdriver, whist applying pressure with the screwdriver pull the ashtray upward.
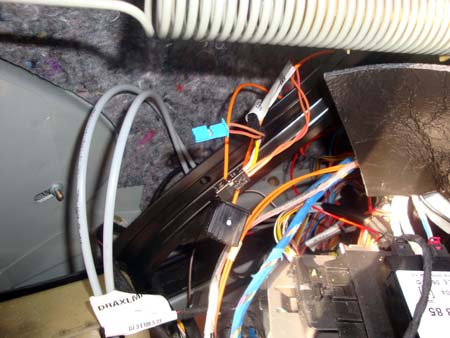
Unplug the blue ashtray light connector and the black cigarette lighter power connector which pulls out at right angles to the body of the cigarette lighter (i.e from the side of the end of the cigarette lighter). The black connector in the picture below is the cigarette lighter power and the blue connector is the ashtray lamp connector. Now remove the 2 screws that hold the lower control panel (the one with the CD changer compartment) in place: -
Unclip the connectors, on cars with no CD changer there is just one connector (the one with lots of wires on the left of the picture below), on cars with CD changer there is also a fibre optic connector (latch on the left of the connector) and the CD power connector (3 wires) to the right of it. Note that if you want to install or remove the CD changer, you should open the CD changer compartment first and then remove the LCP connector (the one on the left) so that it is open for you to work on it.
Now you can remove the whole section, it is easiest to move the gear stick to Drive position when removing it.
Now undo the two screws that go up into the base of the Audio unit, just turn them until they stop turning.
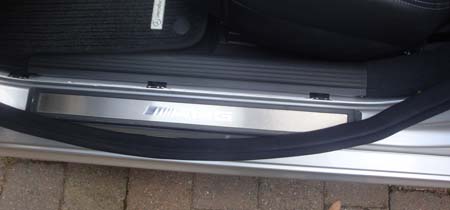
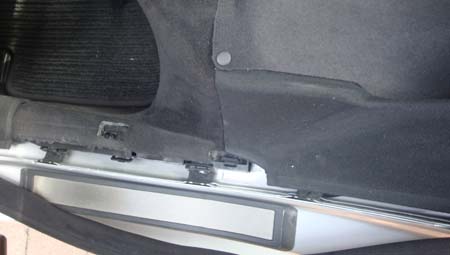
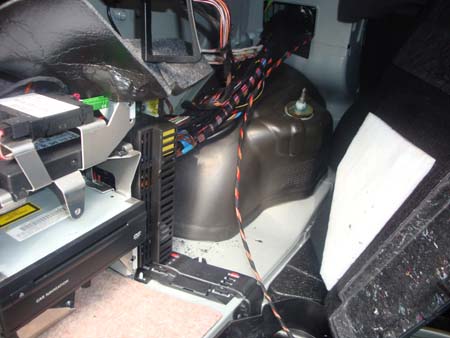
Now you can just slide out the Audio / COMAND unit and disconnect the connections at the rear. Reassembly is just the reverse of removal, remember to test that the CD changer compartment opens and closes before you tighten the screws up - in order for that to work the AGW needs to be connected (which you may have disconnected if you are fitting COMAND) b) Now open the left hand side wiring ducts. Most of the wiring in the W211 E class and W219 CLS class runs down the left hand side of the car. To access the wiring ducts you need to remove the door sills and the left hand rear seat bolster. Remove the inner door (grey plastic) sills from front and rear left hand side doors, this is done by pulling up the rubber trim, and pulling up the plastic sill. They must be pulled up from the rear end as there is a clip at the front end that hooks under the next piece of trim which will break off if you pull it up rather than sliding that end out. The picture below shows the front sill with the rubber removed, the one below that shows the rear with the plastic inner sill removed. Front door sill: -
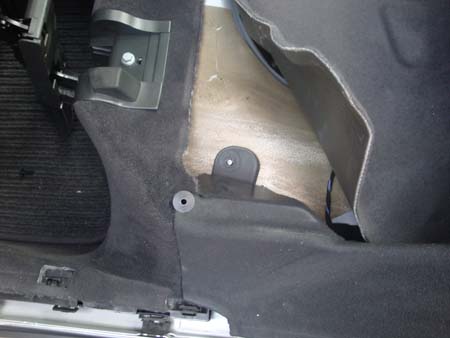
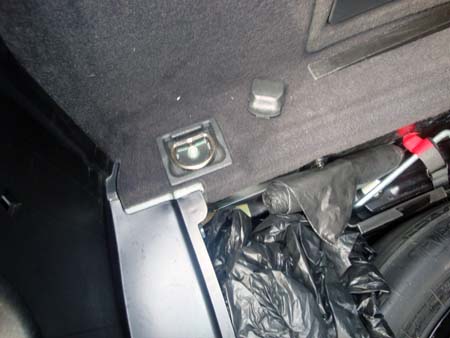
Now remove the rear seat left hand bolster Fold up the rear seat, or in the case of cars without through loading, remove the rear seat base cusion (you can see the clips you need to push in at the front corner of the cushion whilst pulling the front end of the seat up). Once you have removed the seat base or folded it up, you can see a round clip.
Remove the top section of it to allow you to fold up the carpet where you can see a 10mm plastic nut and the rest of the clip, both of which you need to remove.
Once you have removed those you can pull up the side bolster of the seat to reveal the wiring path.
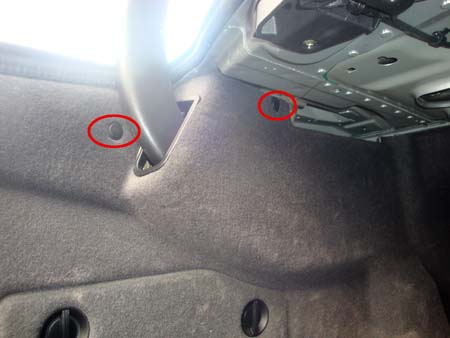
c) Remove other interior panels Now remove the panel above the passenger footwell, which is held in by 2 torx screws - dont forget to carefully unclip wiring to the footwell light if present.
On Left Hand Drive cars you also need to remove the panel above the driver footwell as the wiring loom is always routed down the left hand side of the car but you still need to get to the back of the glovebox. You should be able to get away with just remove the screws and pulling it down without removing the bonnet release or the diagnostic socket. d) Remove left hand side boot trim. This is done by removing the tie-down hooks (proper hooks on cars with through-loading, small ones on cars without).
Then removing the 2 clips (pull top section out, then the rear section, and the black plastic clip around where the boot hinge comes out.
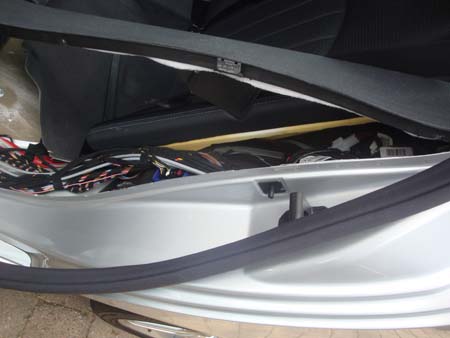
Now pull the rear end of the boot trim out, you can leave the end deep inside the boot in place - be careful not to knock the bulb out of the boot lamp as it is hard to find and will rattle. Re-assembly is just the reverse of removal, again be careful with the boot lamp. If the trim is properly in place putting back the lower tie down screws will be easy.This reveals how the wiring comes from the front of the car to the rear.
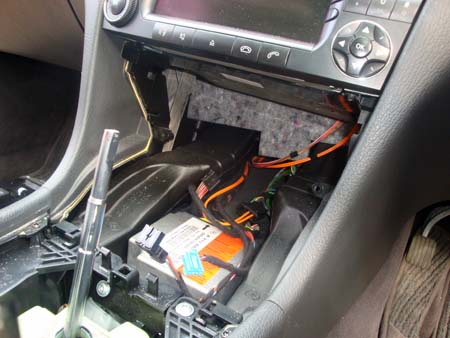
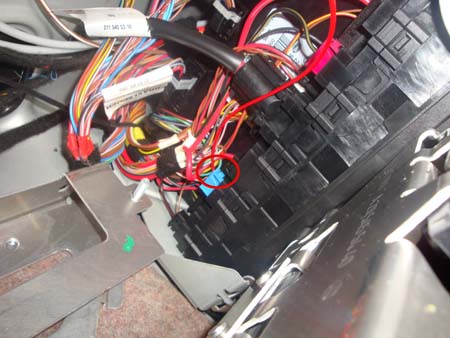
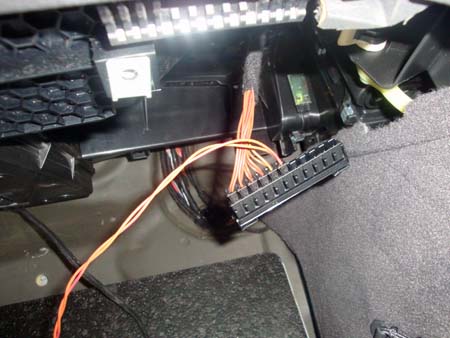
e) Install wiring loom Route the wiring loom from back of car to front, there should be little spare in the boot end especially on left hand drive cars where it needs to also route across the car behind the COMAND unit to below the passenger glovebox on the right hand side of the car. It can be routed under the carpet beside the wiring ducts that run from back to front of the car, or if you are particularly keen you can feed it in the wiring duct that also goes from back to front of car (under the door sills). Remove the screw below the DVD navigation unit, then you can rotate the bracket with navigation unit forward so you can see the rear of the fusebox. Plug the black connector into the back of the fusebox, it goes behind the blue connector, with the red wire at the bottom of it.
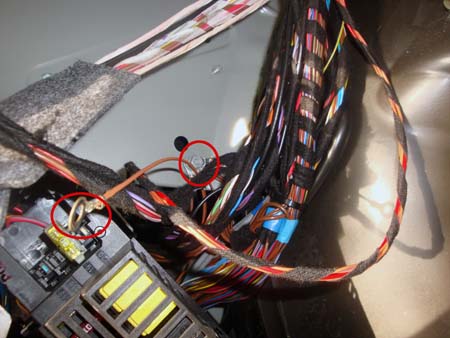
Install the earth cable on the earthing point. Reach up between inner and outer wings and unclip the fibre/control cable from the audio-gateway (amplifer/tuner) that is up there. There is a clip you squeeze in on the left of the connector as you pull it out.
Remove (noting the position) the one brown/red wire from the little blue connector on the iPod loom - you will need the very small screwdriver to unclip the locking clips. Now remove the brown/red wire from pin 2 of the AGW connector and put it in the blue connector. Now remove the brown wire and put in in that blue connector. Be careful not to short either of those wires to the body or each other. Now install the brown/red of the iPod wiring loom in pin 2, and the brown wire in pin 4, and plug it back into the AGW. It is extremely important to get these cables the correct way round. If you're COMAND was retrofitted you may find both wires in the existing wiring loom are grey, and you have to remove some of the felt tape round the wiring loom to remove those wires.
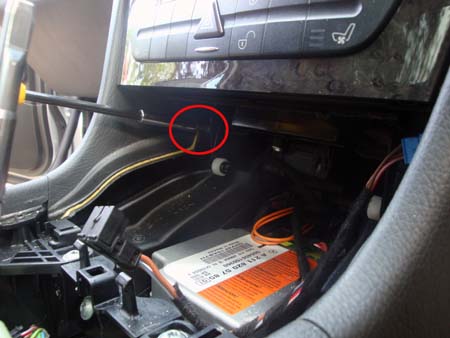
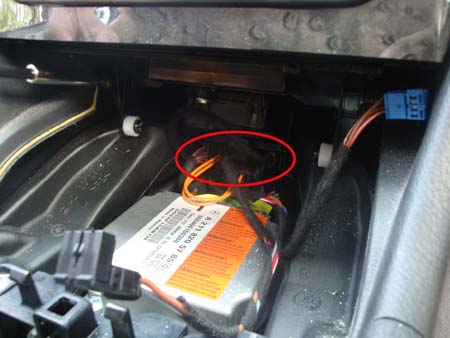
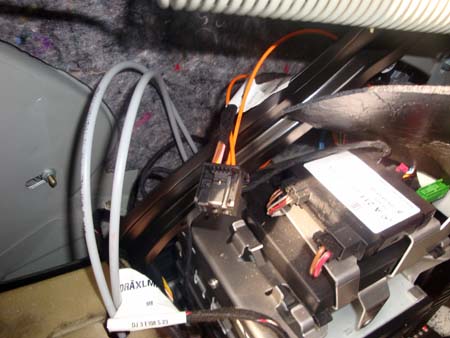
At the front of the car we now need to connect the iPod loom to the car's CANbus distributor - on the Right Hand Drive cars the distributor is fixed above the passenger footwell to the airconditioning box. Unclip it from the mounting by sliding it, and follow the cables backwards as there is a cip holding the bundle of cables in place. When you can get at it properly, the section of the distributor with the mouting clip unclips completely, then you can plug in the CAN connector from the iPod wiring loom and put it all back together.
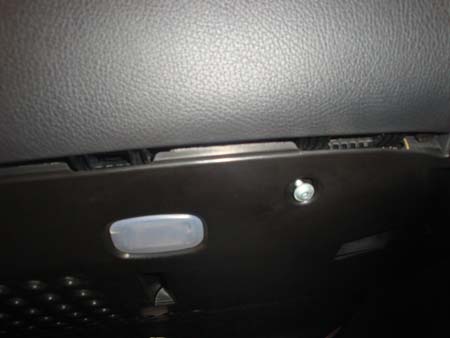
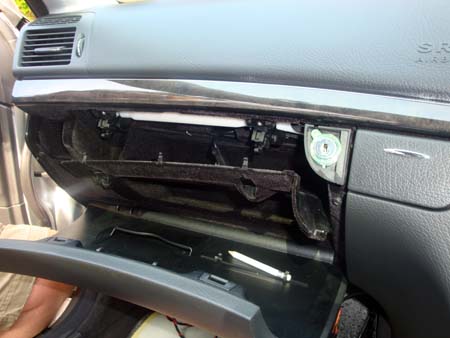
f) Install iPod connector in glovebox This is done by unclipping top section of the glovebox with the AUX connector, you then unclip the front of the connector and it pushes out backwards. Push the iPod connector through (so the bung fits in the hole left by the connector) and route the cable down the back of the glovebox - this is rather fiddly.
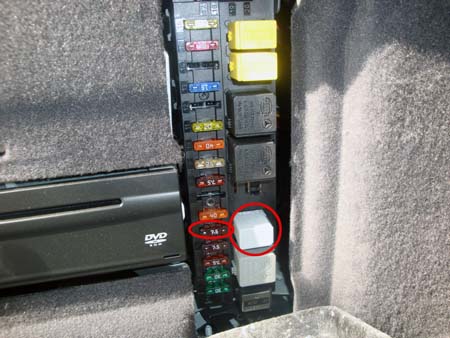
On cars that have had COMAND retroftted, and maybe other cars also you will have to drill a 20mm hole in the side of the glovebox as there is no existing hole. g) Plug all together Plug the RJ48 connector from the iPod lead into the ipod control unit (it will click into place), and plug the main iPod wiring loom into it also. The grey lock on the connector must be rotated upward, then as you push it into the iPod control unit it rotates and locks the connector into place. Using the velcro stick the control unit nicely out of the way behind the glovebox or remove some of the felt from the top of the panel you removed below the glovebox and stick it there. I use the supplied felt tape to wrap the unit to make sure there are no rattles. h) Install fuse and relay into fusebox in trunk. The grey relay goes in position C, and the 7.5A fuse in position 5. (This picture was taken after the boot trim was re-installed).
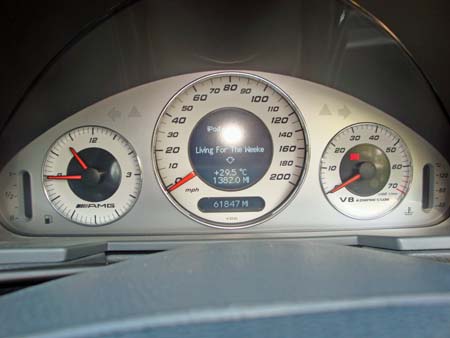
i) Re-assemble & Test, Re-install the COMAND unit. and the lower control panel with it's wiring - don't screw it in yet. Don't forget to plug the new AUX cable from the iPod loom into the 3 pin connector on the rear of the COMAND and not the original wire that goes to the no-longer-used AUX socket. Set your iPod to play a track, plug it in, select AUDIO, then AUX on the COMAND and check you can hear whats playing and that it is displayed on the cluster.
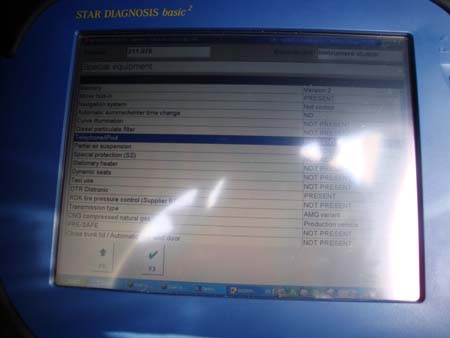
Now that you know it works, re-assemble everything else. Do not forget the footwell lighting, or the cigarette lighter power/lighting or connections to the panel with the gear knob. j) Code with Star Diagnosis No coding is necessary if your car has Telephone, or when you page through the menus on the instrument cluster there is a Telephone menu as this means the telephone buttons on the steering wheel are already enabled. In Star, go into Instrument Cluster, Adaptations, Special Equipment, and turn the iPod/Telephone option on. Save the coding, and you're done - Until this is done the phone buttons on the steering wheel won't work so you can not control the iPod.
Now drive and enjoy your music. V1.0 25th June 2009. V1.1 3rd July 2009 - split out some of the instructions into seperate articles. V1.2 22nd June 2011 - include instructions about plugging in new AUX cable into COMAND |

If you found this information useful, please support the site by making a donation via Paypal. Any amount at all helps me improve the information on the site. |
Comand Online Ltd - the place to buy Mercedes iPod kits, phone kits, retrofit parts & map disks MY AUTOCAR - THE BEST PLACE TO TALK CARS |