 |
!! Please select country!!
Created: 12 Nov 2007
Last Updated: 22 Sep 2013
|
V1.0 12th November 2007 This document contain details of how to install the Mercedes IPOD interface in a Mercedes A (W169), B, facelift C (W203), new C (W204), facelift CLK (W209), ML (W164), GL and R class vehicle that has COMAND APS, MCS-II, Audio 50 APS, Audio 20 CD or cars with the new MY2009 audio systems already installed. Installing the IPOD interface on other models is different and more complex because wires have to be run to the fusebox and the rear of the vehicle. Fitting IPOD interface on a car without COMAND APS, Audio-50-APs or Audio 20-CD, MCS-II is almost identical to the process described below, but a different IPOD kit is required as the wiring connectors are different. Installing the Mercedes IPOD interface in a car with COMAND APS should take about one hour, but if the car does not have the phone system installed it will require coding by the Mercedes dealer or independent workshop with Star Diagnosis to enable the steering wheel controls to operate the IPOD. All the pictures in this document are from European Right Hand Drive vehicles. Installation of the IPOD kit into LHD vehicles are no different (apart from glovebox is on the other side, of course). Model Year 2009. In mid 2008 the Mercedes audio systems were facelifted, COMAND-APS became Hard Disk based, and the units changed considerably - on these cars you can fit the basic iPod kit which is controlled in the same way as pre MY2009 cars, or the Media Interface which is controlled from the COMAND itself. Media Interface retrofit is described in other documents on this website. The pictures are of the pre MY2009 parts, the MY2009 parts look almost identical (the wiring loom is slightly different). This means that the W211/W219/R171 E/CLS/SLK installs are much simpler as all the work is at the front of the car. Tools needed (with MB part numbers where appropriate).
Parts needed.
Parts Notes Please support this site by buying your genuine Mercedes iPod kit & cradle from the Comand Online Webshop - pricing is lower than our UK & Irish Mercedes Benz dealers. If you want someone to install this then see my Mercedes retrofit specialist document on Mercupgrades.com If you are purchasing the iPod kit from a Mercedes dealer just ask for the latest version for your particular car. The iPod line amp increase the iPod volume and is required on the W204 new C Class without Harmon Karden sound system. We have found it works very well on all the iPod kits and suggest that you seriously consider installing it. Installation: There are a number of steps, which are explained further below.
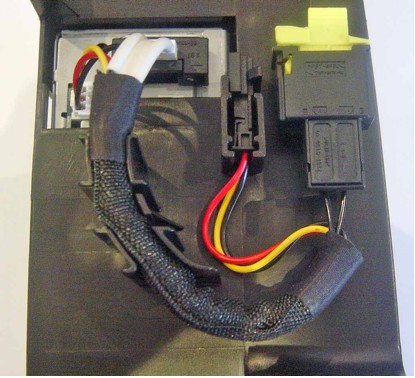
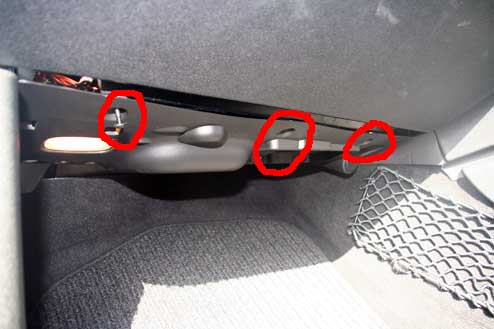
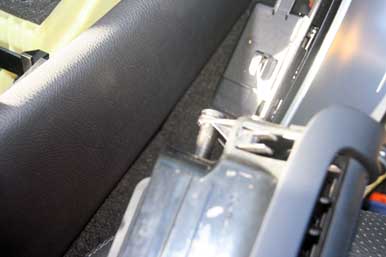
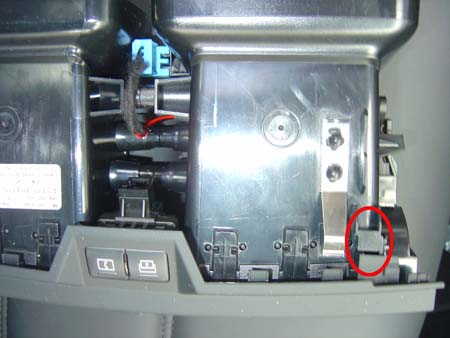
1) Remove Glovebox We need to get access to get the IPOD wire into the glovebox. W169 A, W245 B Class: If you have no CD changer you may be able to push the cables through the hold in bottom corner on the side near the centre. If you do have a CD changer then you will have to remove the CD changer in order to file the plastic bracket so the IPOD ccable can pass behind it and out into the centre of the glovebox. You can probably do this without removing the glovebox by just pulling the CDC bracket forward - but if it is too tough you may have to undo the glovebox. Remove the cover above the passenger footwell below the glovebox, there are two TORX scews on the front edge, once removed the cover drops slightly and slides towards you. If you have the interior lights package you will have to unclip the light, or the power to the light as you remove the cover. If you have the CD changer installed, pull the bracket with the CD changer forward from the middle of the glovebox. You will have to reach round and release the power and fibre connectors. The picture below shows those connectors on the back of the CD changer bracket. The power connecor pulls out, the fibre one has a catch which you can see on the yellow dust cover plug on the left.
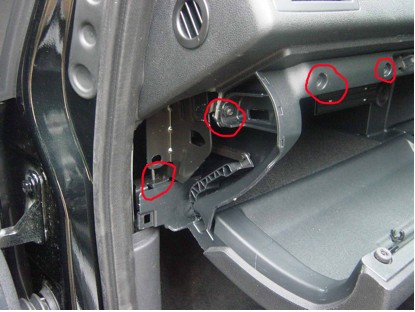
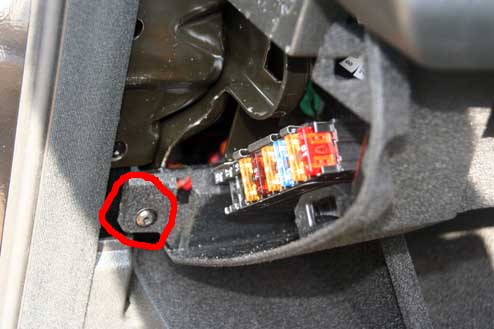
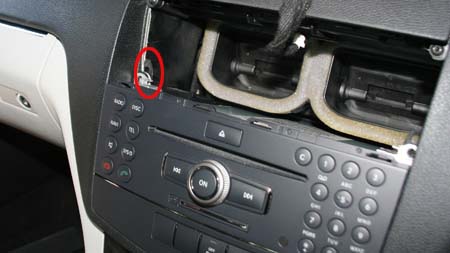
Remove the two TORX screws that hold the bottom of the glovebox that are now visible - you can see the top of part of one of them in the picture below (left most red highlghted area). Open the glovebox and remove the small panel with the airbag sticker on it that is normally hidden by the door. You will probably have to pull off the door frame seal around the area of the panel. Remove the TORX screw for the side of the glovebox (2nd from left in picture below) Remove the covers from the 4 torx screws along the top edge of the glovebox, and the 4 screws. Pull out glovebox, noting the pipework to the airvent for reassembly. Picture of glovebox from side with panel removed, showing some of the screws.
When you re-assemble it, dont forget to put the airvent pipe back correctly connect the footwell light back up.
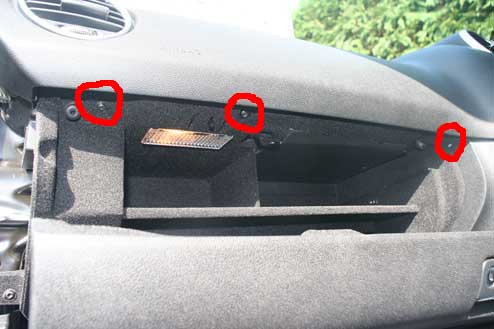
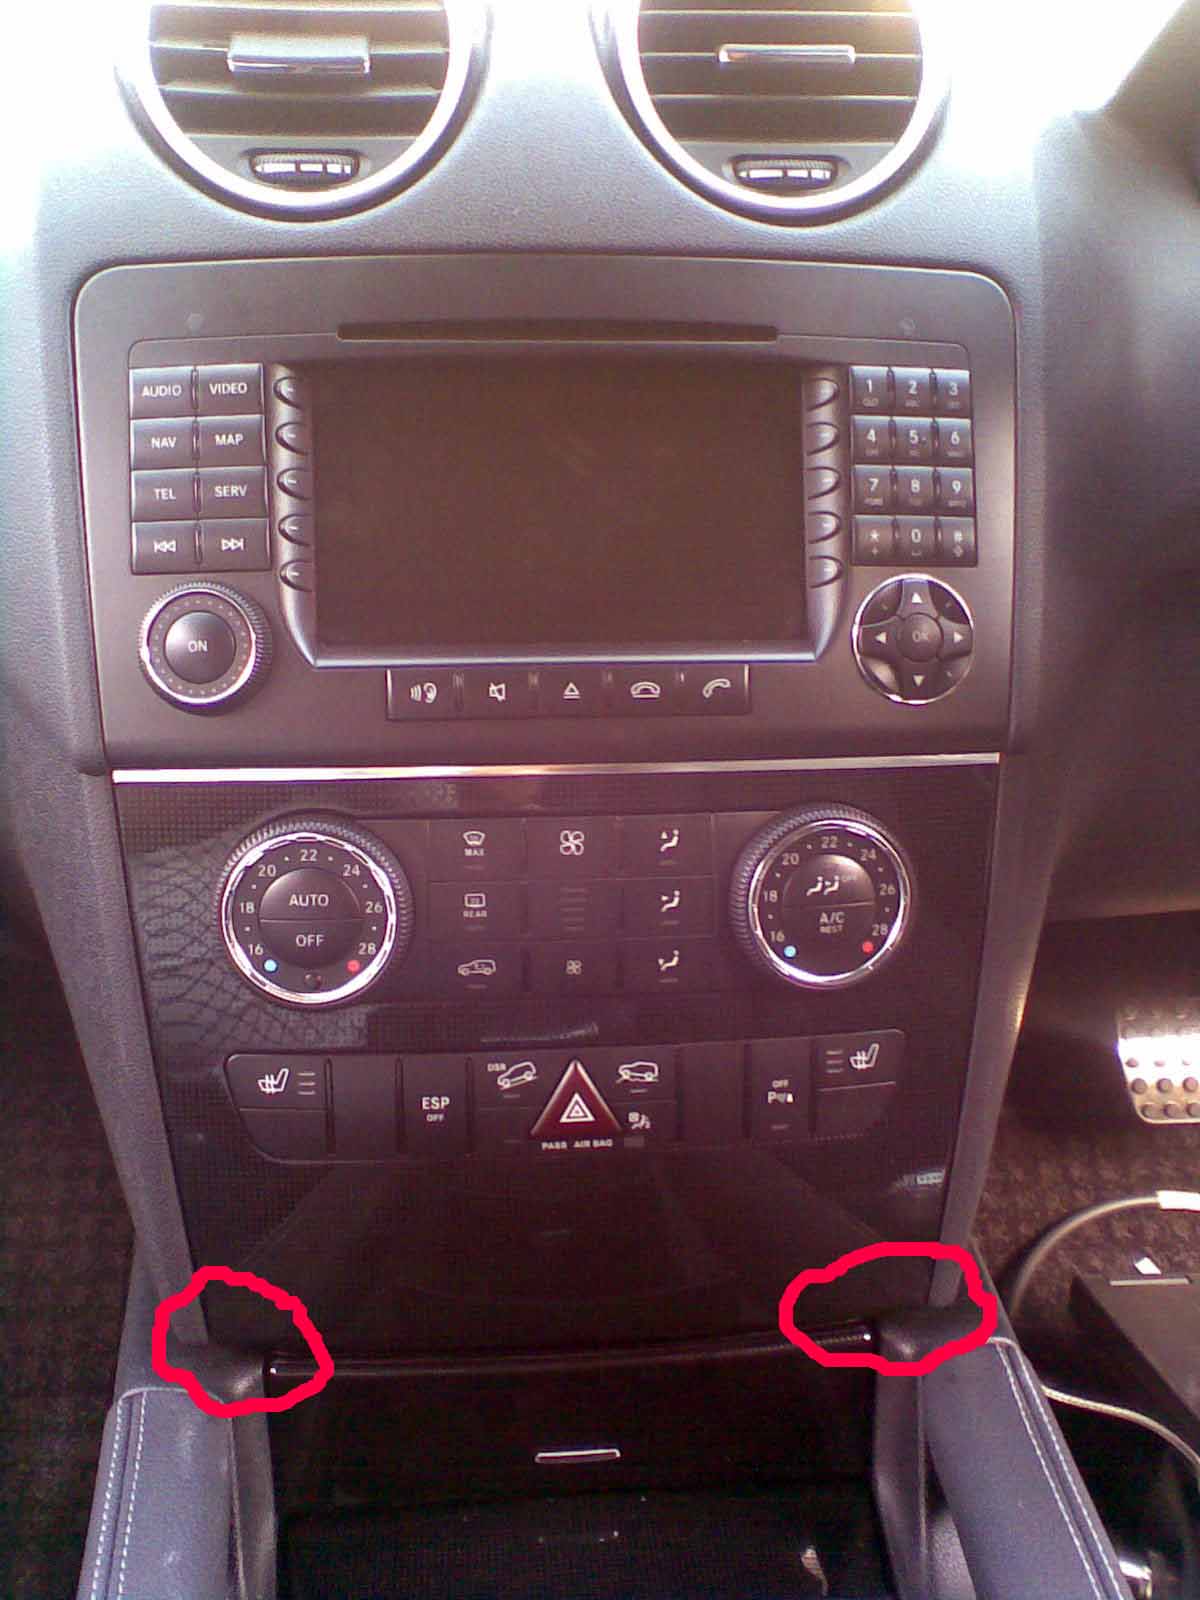
W203 C, W204 new C, W209 CLK Class, W203 CLC: Not necessary & complicated. Just remove the panel on the side of the dash (which is hidden when the door is closed) - it pulls off from the front edge, you may have to loosen the door seal around the edge of the panel. On the CLK you may have to unclip the glovebox door, unlink the hydraulic closer so the door can be unclipped - you'll see the retaining clip once you have removed the panel at the side of the dash. W164 ML, GL, W251 R Class: It may not be necessary to do this, but it will make life easier. You will have to remove the AUX input if you have on in the glovebox. To remove the glovebox on the ML, GL and R class vehicles, firstly remove the panel at the side of the dash to expose one of the screws - this is done by pulling it away from the dashboard. (Right Hand drive vehicle pictures)
Then remove the 3 screws from underneath the glovebox.
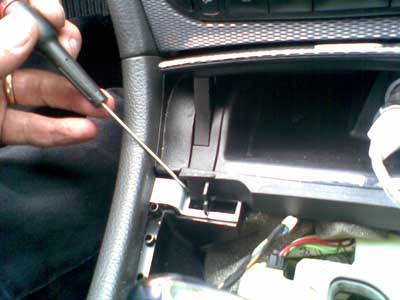
Then open the glovebox. If you have a AUX input in the glovebox, lever the front of it outward, with a screwdriver, it clips forward allowing the whole thing to go back through the hole it is located in. Now remove the 3 screws from along the top of the glovebox. Note that one of the screws is like the screws from underneath, the other two are like the side screw.
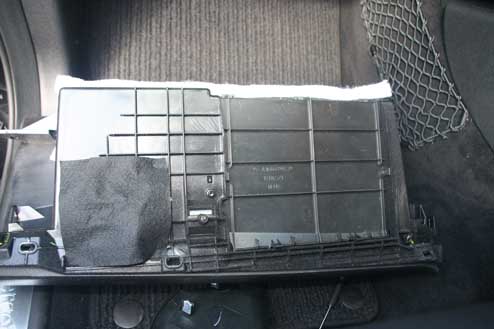
Now pull the glovebox down from the top edge and slide out. You will have to disconnect the power lead for the light, it just slides out, and make sure the AUX lead drops out properly rather than damaging the cable. The picture of the removed glovebox below shows a car without a CD changer, otherwise the black plastic panel on the right of it will not be there.
W211 E, W219 CLS Class - MODEL YEAR 2009 ONLY: Not necessary, the top of the glovebox can be cliped down if there is a AUX socket there.
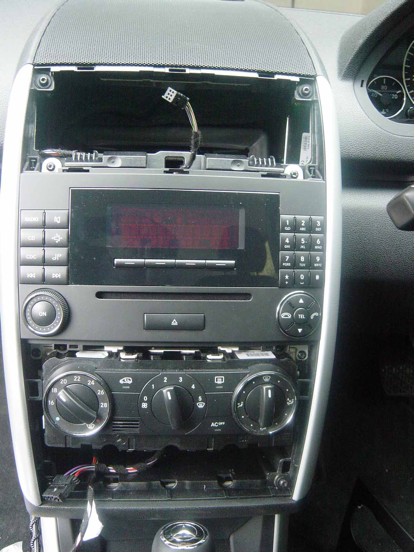
2) Remove kick panel There are 2 or 3 torx screws along the front edge of the panel above the passenger's feet below the glovebox. If you did not already remove these, remove them now and drop the panel down. This is done to allow wiring and IPOD interface installation. 3) Remove Audio Head Unit W169 A, W245 B Class: To remove the audio or COMAND unit on the A and B class, you need to gain access to the four torx screws that hold it in place. The procedure is as follows: -
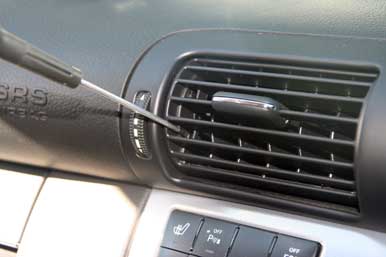
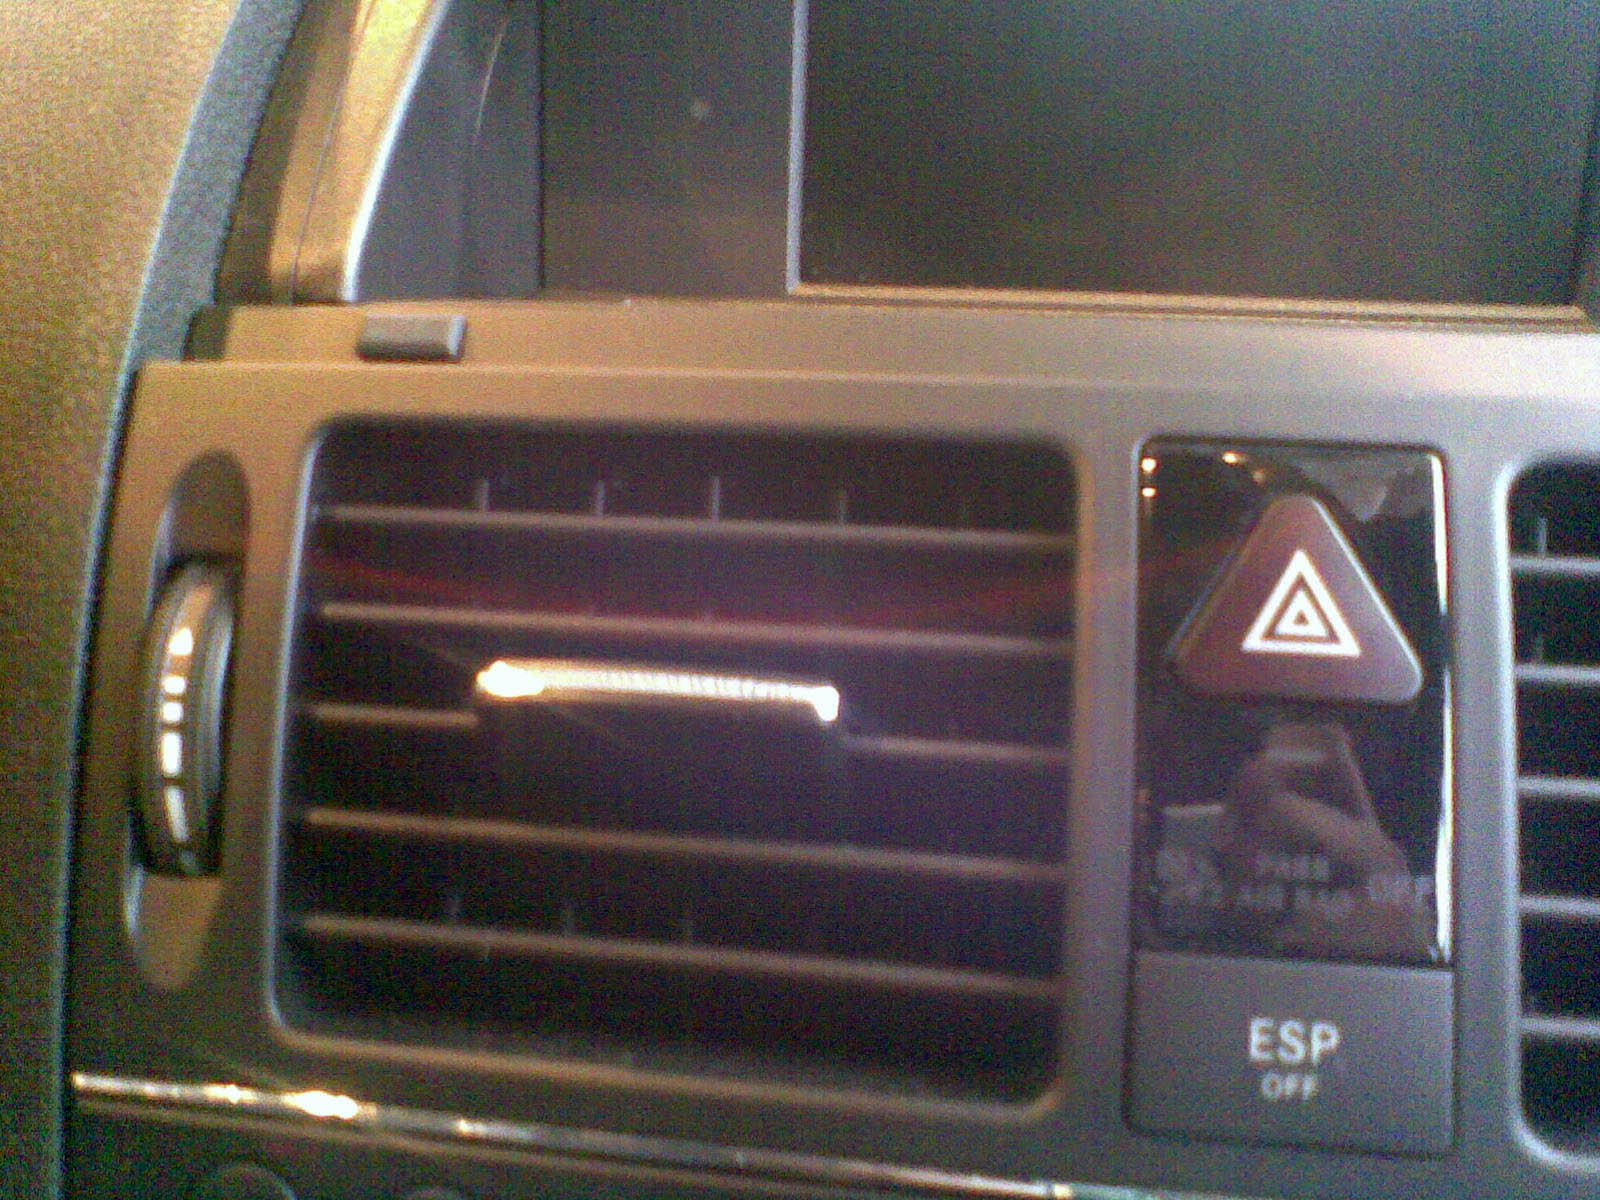
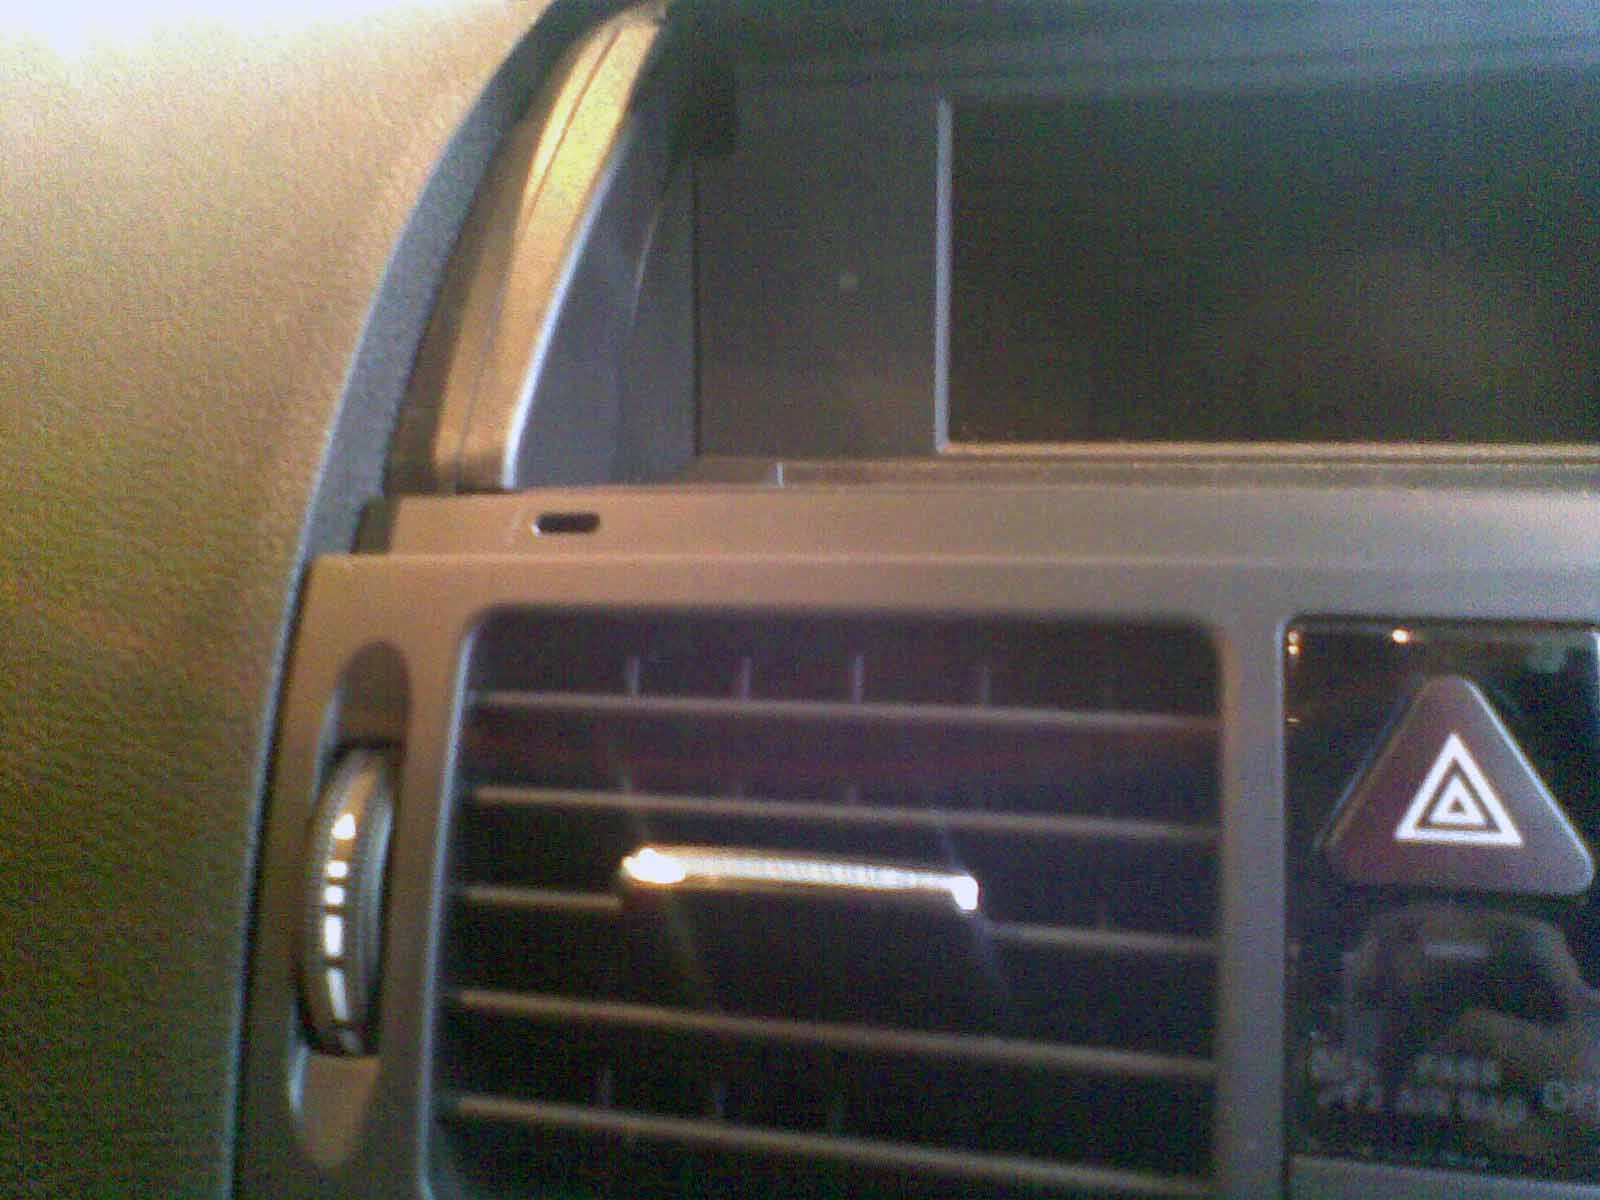
Remove air-vent. This is done using the Mercedes pulling hooks. Close the air-vent (which prevents damage to the mechanism) insert the pulling hooks into the catches which are visible through one of the top slots on each side prising them inwards whilst pulling the vent out. Disconect the connector to the hazard warning switch / airbag-off lamp and then remove the vent completely. Here is a picture of the side of the vent after removing it, you can see the catches - the protruding part holds the unit to the dash board, and is levered inward with the pulling hooks.
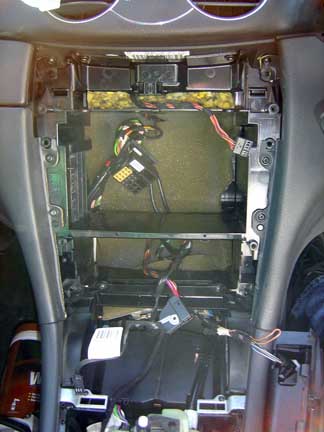
Remove lower panel The lower panel is removed by levering it outwards from the bottom, near the edges using the Mercedes plastic wedge tool (or something else hard that will not damage the panel). I used the pulling hooks after prising the panel forward with the wedge. Once the bottom edge is freed (and quite a lot of force is needed), then the top releases at the sides by pulling sharply. Do not put any pressure against the metal trim at the sides of the central console, they bend or dent easily. Also ensure that pulling hooks are fully inserted as the panel is two pieces and you may split it in two. Once it is all removed, it will look like this, and you can see the 4 torx screws that hold the audio unit in place.
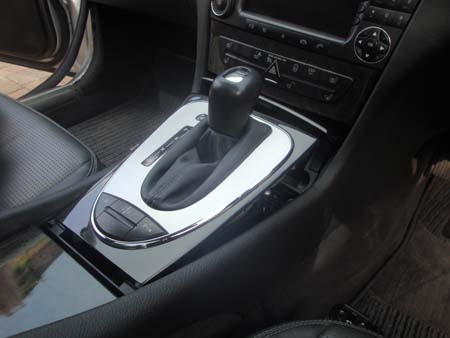
Remove the four screws and the audio unit can be slid out. Note how the wire to the hazard switch is routed, it is clipped into place on the left hand side of the vent hole, and passes through the hole visible in the centre of the picture. W203 C, W202 CLC, W209 CLK Class: To remove the audio unit on the facelifted Mercedes W203 C and W209 CLK class, you have to access the four torx screws that hold it in place. This is simpler on the CLK than the C, as you do not have to remove the air vents. a) Remove gear knob and surround. Pull up the edge of the gearknob, and then turn the locking ring at the bottom of the gearknob anti-clockwise (i.e not the natural way you would expect) half a turn and pull the gearknob upward to remove. Picture of the locking ring.
b) Remove panel around gear knob. This is done by simply pulling it upwards from the front, and then the rear. c) Remove ash-tray. Release the catches and pull upwards. Here is a picture of the ashtray and the catches.
d) Remove aircon surround. Look up under the panel through where the ashtray was. You can either see two screws and two catches or four screws. - if you have 4 screws remove the two that are at an angle, otherwise release the catches. You can then remove the lower control panel, and see the 2 torx screws that hold the bottom of the audio unit. Here is a picture with the screw on the left that must be removed highlighted.
Remove the aircon controls and panel, which reveals the lower screws for the audio system.
e) C Class only: - remove vents The vents are held in by 2 screws at the bottom corners and two clips at the top corner. To see these screws and clips the vents have to be moved completely to the top and then completely to the bottom. To allow the vents to move, there are catches that must be released with a small screwdriver. The catch to make it move to the top is shown in this picture, the catch to make it move to the top is two sections above.
After the vent has been moved to the upper position, you can see the lower screws. Loosen these but not too far or they'll drop out.
Then move the vent to the lower position (don't forget to release the locks) to view the top catches and using the pulling hooks, pull the catch in and the vent out. Here is a picture of the catch on the vent when the vent is removed so you can see how it works.
f) C Class only: remove top two screws holding the Upper Control Panel (UCP),
and remove the UCP to show the top two screws of the audio unit.
g) CLK class - open the coin tray next to the upper control panel, slide your finger in behind the edge of the UCP and pull - it will pop out quite easily, revealing the top two screws of the audio unit. h) Remove audio unit Remove the four screws holding the audio unit, and remove the audio unit. i) More pictures Here is what the CLK looks like with those panels and the audio unit removed.
W204 new C Class: a) Remove air vents This is done by opening the display section -look at where the display section meets the top of the vents, you may have to peel up the front of the display plastic which is stuck to the top of the vents. Then, remove the 2 rubber plugs just above the vents, which act as bump stops for the display and using the mercedes hook tools, slide them in about 3-4 cm and turn them to point downward to catch on the vent (see picture below). The vent can then be pulled out by pulling hard, as it is held in with metal friction catches. Picture of rubber buffer by vent:
Buffer removed showing hole for extractor hook: -
Picture showing where the pulling hooks actually hook onto the inside of the vent moulding to pull the vent out, and the silver metal friction catch (one on each side) that hold it in place:
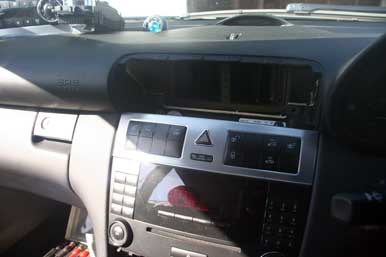
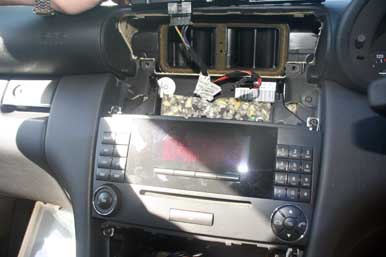
Note the positioning of the wiring that goes to the switches in the vent panel, disconnect the wiring, and fully remove the vent. b) Remove radio and lower control panel. At this point you should cover the gear knob with a cloth to protect it from damage from the bottom of the radio unit. Having removed the vents we can see the two torx screws that hold the top of the old radio control unit. Remove these and slide the black latches just behind the screws up, pull out the old radio unit far enough to disconnect the wiring to it and the lower control panel.
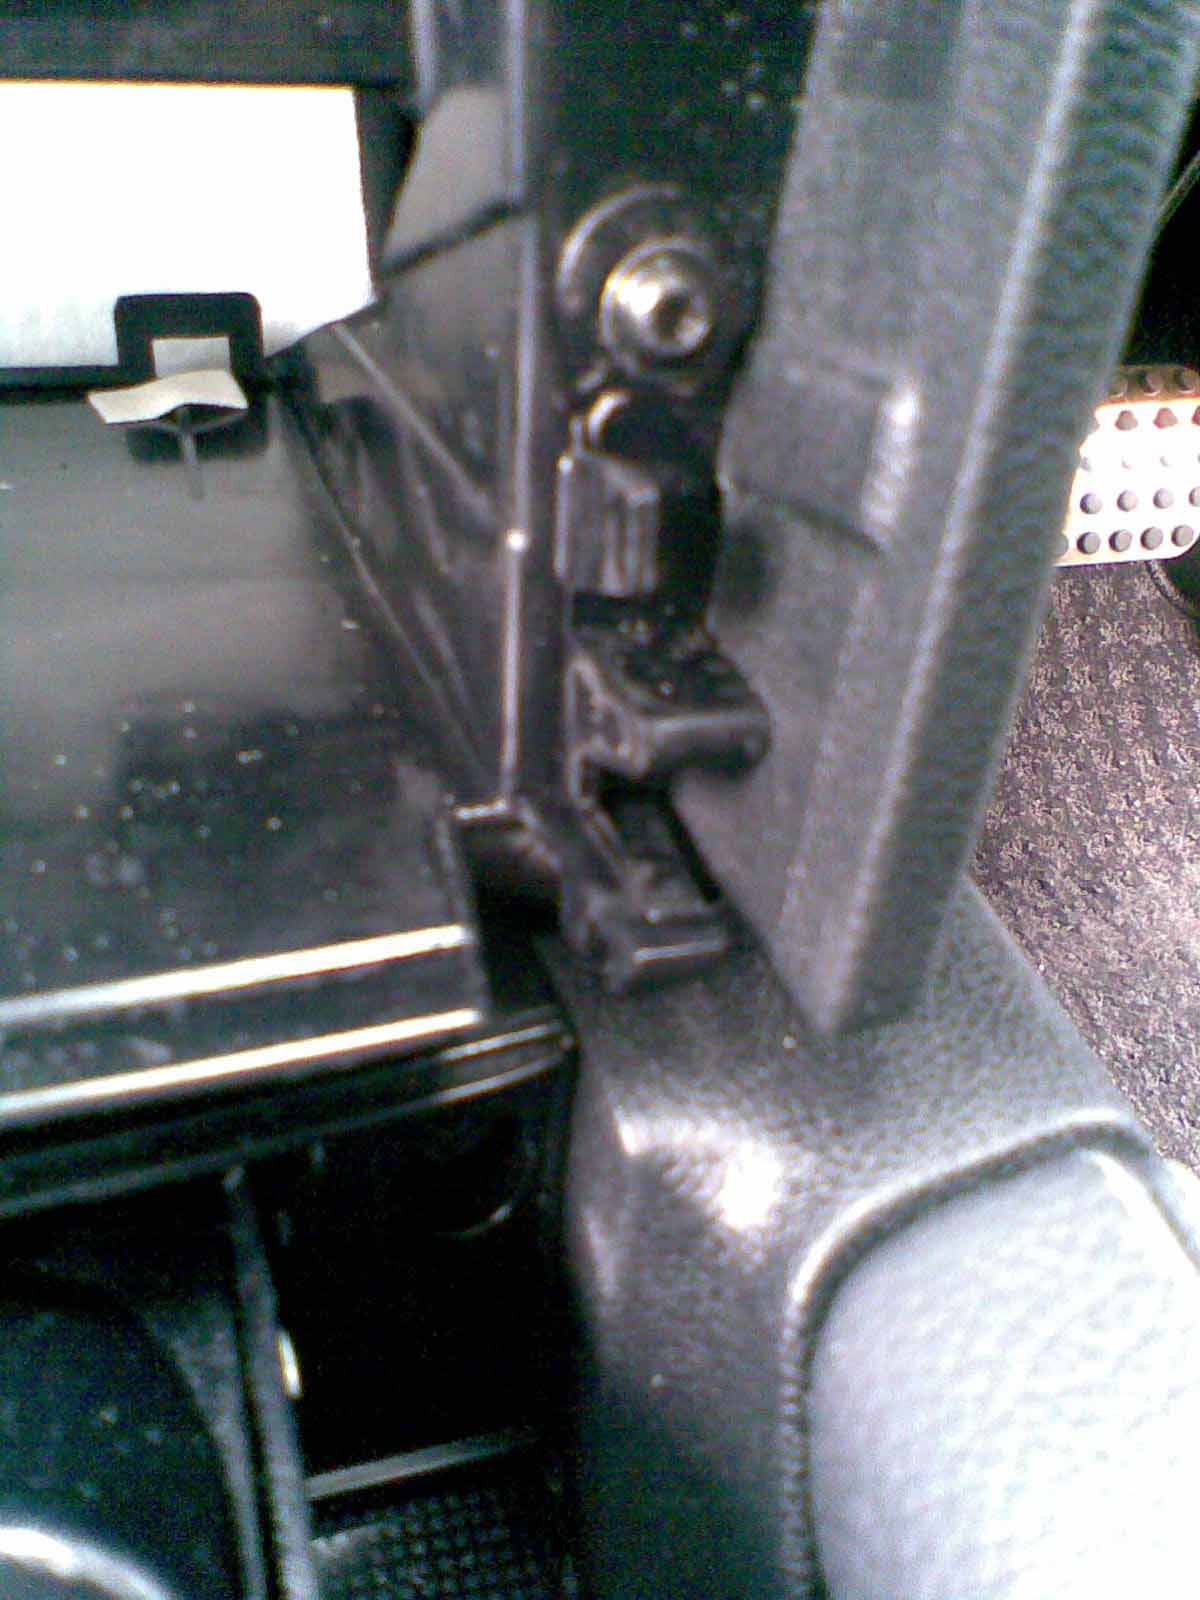
Be very careful of the orange fibre optic cables (if any) in the large multiway connector and the cable to the display - they are fragile and expensive. - Reassembly is the reverse of disassembly - remember to route the wires carefully so they do not get trapped behind the audio unit or the airvent panel. W164 ML, GL, W251 R Class: This is a quick guide to removing & re-installing the COMAND or Audio head unit in the ML (new, W164) or GL. This is a very simple process ! Firstly remove the whole panel below COMAND with the aircon and other buttons - this is done by opening the ash-tray, and putting 2 fingers below the panel on each side, pushing upward to release the latches and pulling hard. Here is a picture showing where you are pulling once the ashtray is open.
The picture below shows one of the latches that your fingers are pushing upwards - there is one at each side
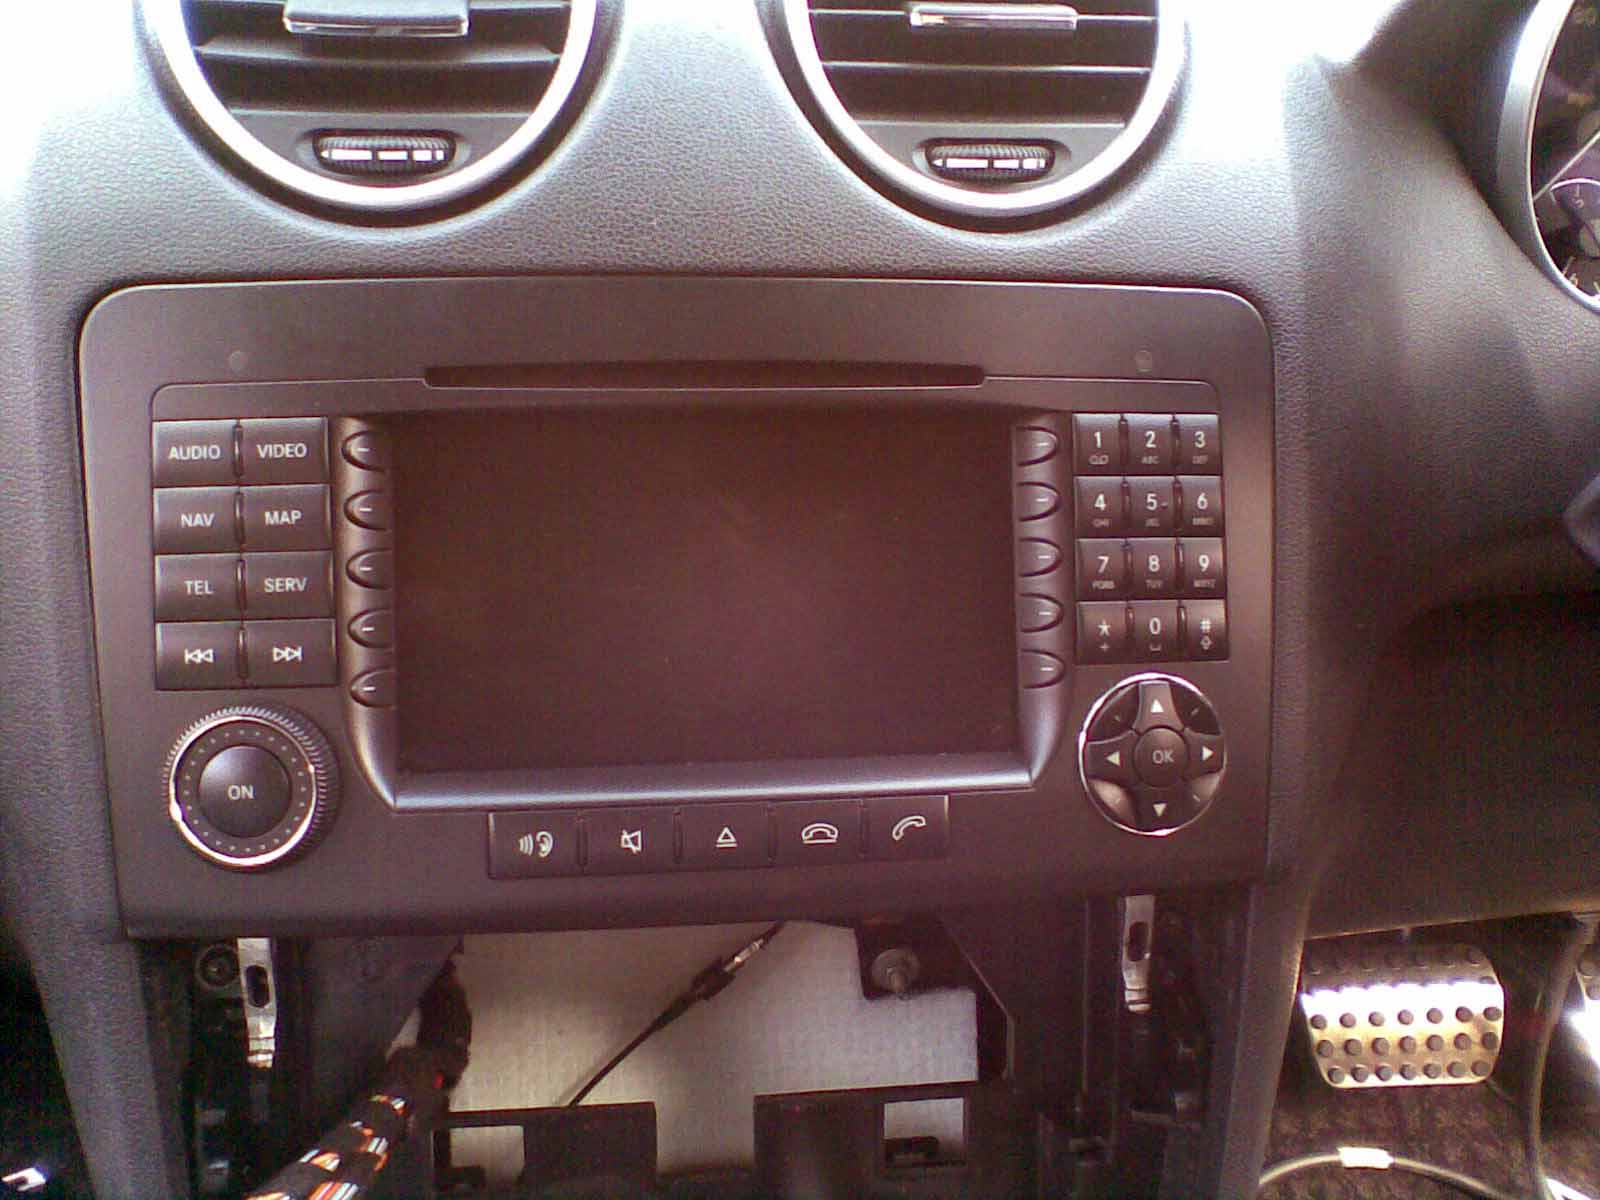
You then see two silver bars below the audio head unit - remove the 2 TORX screws, silde them downward, and then you can remove the head unit. Here is a picture with the screws removed and the locking bars moved downward.
Install is reverse of removal !
W211 E, W219 CLS Model Year 2009 ONLY: Firstly remove the wooden surround panel around the gearstick. On the W211 E class you just pull up the front edge (it is hooked in at the rear edge), and the whole panel comes up.
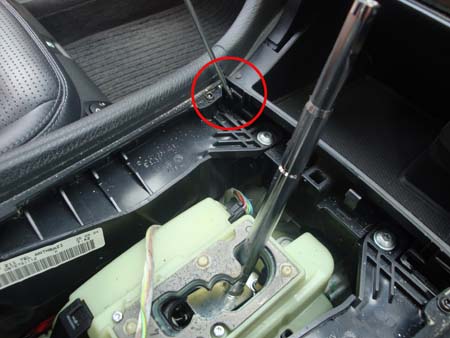
On the W219 CLS it is easier to leave the wood surround in place and pull up the metal surround of the actual gear lever, then you can reach through the hole and push the catches (you can feel one at each end of the front edge of the trim) whilst pulling the wood trim up from the front. Once the panel is pulled up, you can see a knurled plastic nut at the bottom of the gearknob itself, rotate anti-clockwise, unplug all the wires connected to the panel and then pull the gearknob upwards and remove the panel. Now you need to release the catches that hold the ashtray in place, there are two and they clip slightly forward using a screwdriver, whist applying pressure with the screwdriver pull the ashtray upward.
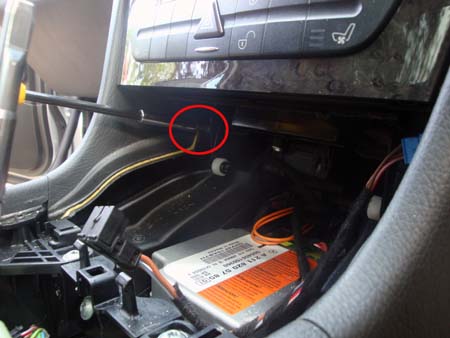
Unplug the blue ashtray light connector and the black cigarette lighter power connector which pulls out at right angles to the body of the cigarette lighter (i.e from the side of the end of the cigarette lighter). The black connector in the picture below is the cigarette lighter power and the blue connector is the ashtray lamp connector. Now remove the 2 screws that hold the lower control panel (the one with the CD changer compartment) in place: -
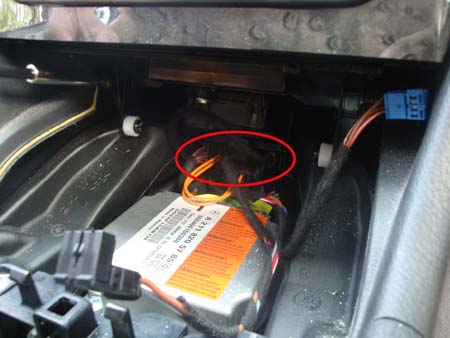
Unclip the connectors, on cars with no CD changer there is just one connector (the one with lots of wires on the left of the picture below), on cars with CD changer there is also a fibre optic connector (latch on the left of the connector) and the CD power connector (3 wires) to the right of it. Note that if you want to install or remove the CD changer, you should open the CD changer compartment first and then remove the LCP connector (the one on the left) so that it is open for you to work on it.
Now you can remove the whole section, it is easiest to move the gear stick to Drive position when removing it.
Now undo the two screws that go up into the base of the Audio unit, just turn them until they stop turning.
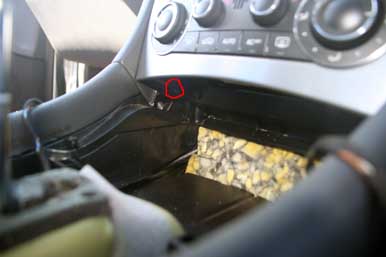
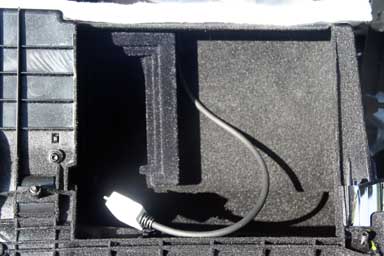
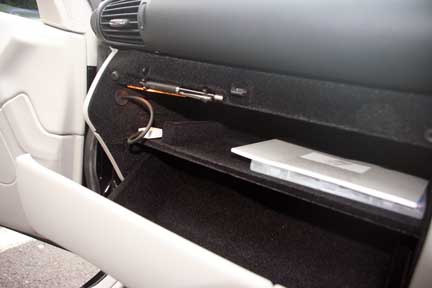
Now you can just slide out the Audio / COMAND unit and disconnect the connections at the rear. Reassembly is just the reverse of removal, remember to test that the CD changer compartment opens and closes before you tighten the screws up - in order for that to work the AGW needs to be connected (which you may have disconnected if you are fitting COMAND) 4) Make/open hole in glovebox. A,B Class: there is already a hole in the back corner on the side near the centre of the car. C,CLC,CLK class: you can see a round knock out panel on the outerside of the glovebox. Cars with AUX input will have the AUX input connector there. ML,GL,R class: We will use the AUX wiring harness hole. If your car did not have an AUX input in the glovebox there is a small plastic cover that unclips. Otherwise you will have removed that part of the AUX input socket when you removed the glovebox. MY09 E, CLS: Use the AUX wiring hole in the glovebox, if there is not one you will have to drill a 20mm hole in the side of the glovebox. 5) Install wiring loom from glovebox to interface Install the wiring loom into the glovebox. The rubber bung on the IPOD cable will fit into the hole for the AUX input on the ML/GL/R, it will pass through the large hole in the A/B class, but you may have to pull out the white plastic insert in the centre of the bung on the C/CLK to make it fit in the hole. Stick the IPOD cradle in place with the double sided sticky pads (not supplied with IPOD kit). On the ML, GL, R class you can use some of the felt supplied to tape the cable out of sight to the back of the glovebox. On the ML, you can also route the cable back into the area behind the COMAND unit. Picture of ML class cradle cable - you can see the rubber bung on the right where the cable enters the glovebox. This is taken through the CD changer drop down hole in the top of the glovebox.
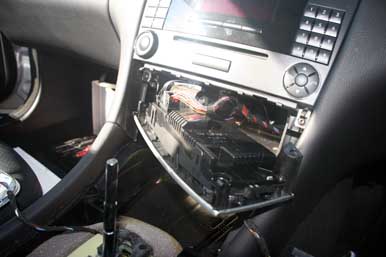
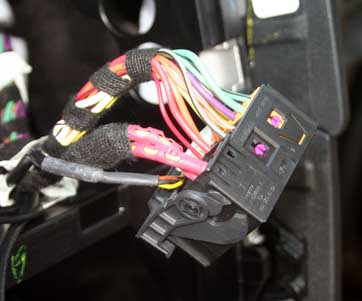
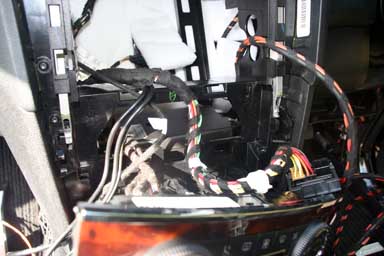
6) Install wiring loom from interface to head unit Firstly carefully remove the fibre optic connector (the one with the two orange fibres) from the head unit connector. If you can release the fibre optic loom from the main loom by removing some tape from the loom do so. If your car had the AUX input connector in the glovebox you may as well remove the cable competely and remove the connector block from the head unit connector. This is particularly easy on the ML, GL and R class. On the A, B class i would leave it in place as you do not re-use the hole in the glovebox left by the AUX input connector for the IPOD cable. Picture of ML class head unit connector. The connector is identical for A,B,C,CLK,ML,GL and R class Mercedes vehicles. The AUX input is the small black harness with yellow, red, black wires visible. The fibre optic connector has some purple strengthening on this car.
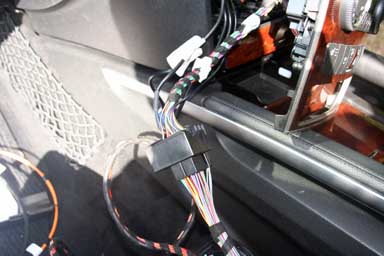
Connect the IPOD adapter cable to the existing cable, and now connect the fibre connector into the new head unit connector (its the outer one of the two possible connectors). Picture of car's head unit connector connected to IPOD cable connector (ML): -
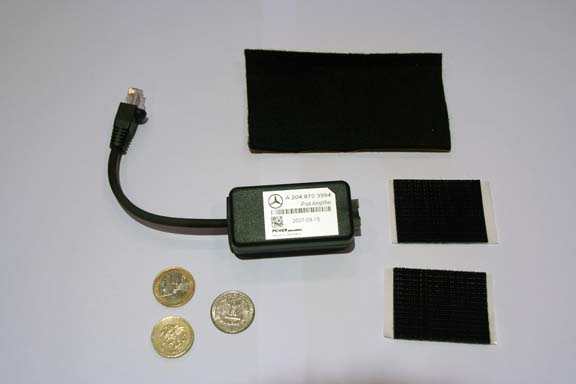
Push the interface end of the cable through into the footwell on the A, B, C, CLK class. On the ML,R class the IPOD interface will sit below the COMAND unit, so keep that cable handy. Do not plug the COMAND unit back in until the IPOD interface is connected up. 7) Connect and Install Interface The optional iPod line amp plugs into the iPod interface, and the cable that goes to the iPod plugs into the line amp. You should wrap the line amp in some of the supplied felt tape to prevent it rattling and/or fix it in place with the supplied velcro. Picture of optional iPod lineamp (coins are £1, €1 and US 25c)
The lineamp is always used on Model Year 2009 cars without Harmon Kardon sound system. On the A, B, C, CLC, CLK class cars wrap the interface in the supplied felt tape and connect the two connectors to it (one from IPOD or lineamp and one from head unit). On C and CLK you should leave a bit of the plastic surface of the interface visible and put one of the supplied velcro pads on that. A, B class: use some cable ties to fix the IPOD interface to the removed kick panel above passenger feet. C, CLC, CLK: the IPOD interface can be wedged to the outer side of the glovebox, between the A pillar and the air conditioning box - use the velcro to hold it in place. ML, GL, R class: use the supplied velcro to fix the interface below the COMAND. MY2009 E, CLS: Remove some of the padding from the panel below the glovebox and stick the control unit to it using the supplied velcro. If you are installing the optional iPod line amplifer, plug it into the interface before positioning the interface to ensure it will all fit. Picture of interface in ML sat on shelf below COMAND unit.
8) Test and Re-assembly You should now connect the head-unit back up again, and plug an IPOD in. The IPOD will display a Mercedes logo (perhaps not on the latest IPOD nano that plays video or the touchscreen IPOD). Pre MY2009 cars: you should select the AUX input to hear the sound. You will see the track names on the Audio display on the cluster. The steering wheel controls (phone up / phone down) will may work if you do not have the phone system installed on your car - a Mercedes dealer will have to code the cluster to tell it the phone system is present, and you will also then have a 'phone' menu on the cluster display which will say 'no telephone' (or similar). The cluster display will look like this ML one: -
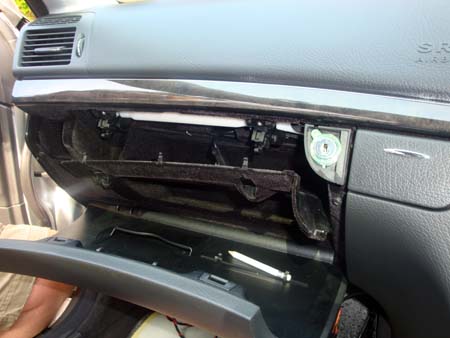
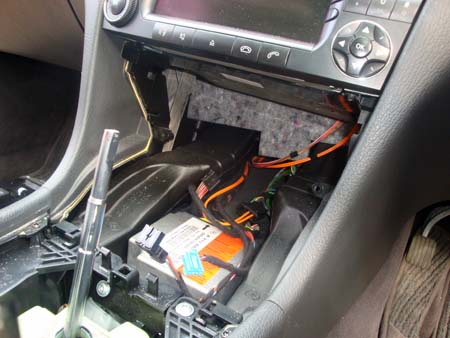
Reassambly Is the reverse of dismantly, Remember that on the ML, GL and R class one of the top glovebox screws is same as the screws under the dash and not the other 2 top glovebox screws. Also, on the W203 C, CLC, CLK ensure that the screws in the top vent are screwed in a bit so they don't fall out, and when installing the kick plate above passenger footwell that the air-vent piping (if present) is correctly installed. And on the A, B class ensure the air-vent tube for the glovebox vent is in place. 9) Coding If the car does not have telephone pre-wiring the dealer will probably have to turn on the 'Telephone' in the Instrument Cluster coding screen on Star Diagnosis - although on US vehicles and later European cradles it is often already enabled. If you have a 'Telephone' screen on the cluster, then the controls are enabled. Model Year 2009 cars will not need coding. Completed Install Pictures: W203 C Class IPOD (Right hand Drive) installed:
|


If you found this information useful, please support the site by making a donation via Paypal. Any amount at all helps me improve the information on the site. |
Comand Online Ltd - the place to buy Mercedes iPod kits, phone kits, retrofit parts & map disks MY AUTOCAR - THE BEST PLACE TO TALK CARS |