
 |
!! Please select country!!
Created: 10 Sep 2007
Last Updated: 29 Dec 2007
|
V1.0 14th September 2007 This document contain details of how to retrofit the CD changer in a new shape ML, GL or R class Mercedes Benz vehicle. It should take about two hours, but the car will probably need coding by a Mercedes dealer with Star Diagnosis for the system to recognise the CD changer. Please note I have a Left Hand Drive vehicle bracket, ML/GL button all screws, and fibre optic suitable if you have phone/sound-system or TV installed for sale as I ordered the wrong parts for RHD vehicle. Please use the Contact Us function if you wish to support this site and purchase it from me ! Tools needed.
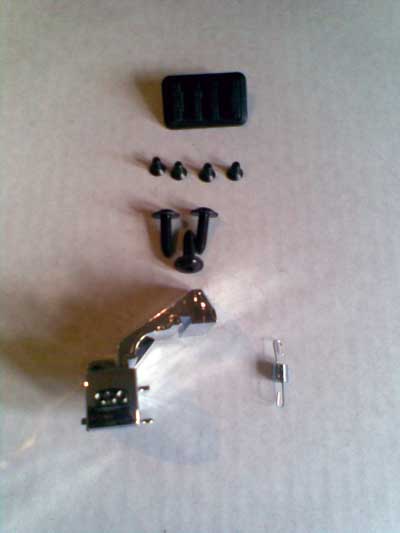
Parts needed.
Parts Notes Here is a eBay search tool that will find you a CD changer - please ensure you have selected your country (on the left) first. Picture of cable holder, CD changer screws. CD bracket screws and release button (left hand drive cars).
Installation: There are a number of steps, which are explained further below.
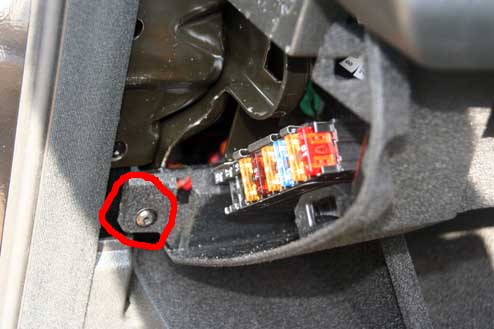
1) Remove Glovebox To remove the glovebox on the ML, GL and R class vehicles, firstly remove the panel at the side of the dash to expose one of the screws - this is done by pulling it away from the dashboard. (Right Hand drive vehicle pictures)
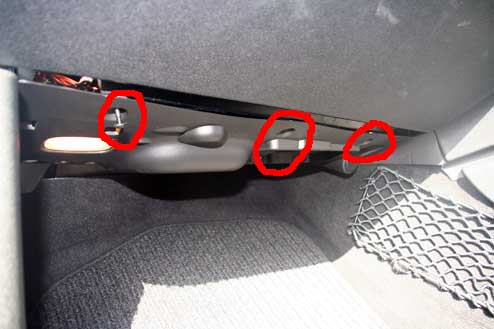
Then remove the 3 screws from underneath the glovebox.
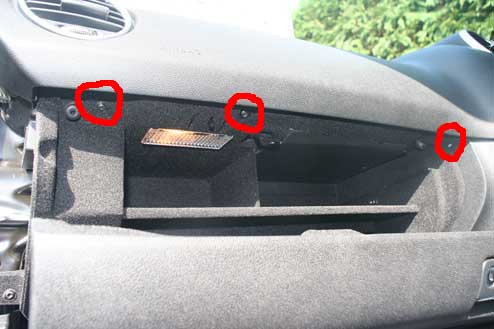
Then open the glovebox. If you have a AUX input in the glovebox, lever the front of it outward, with a screwdriver, it clips forward allowing the whole thing to go back through the hole it is located in. Now remove the 3 screws from along the top of the glovebox. Note that one of the screws is like the screws from underneath, the other two are like the side screw.
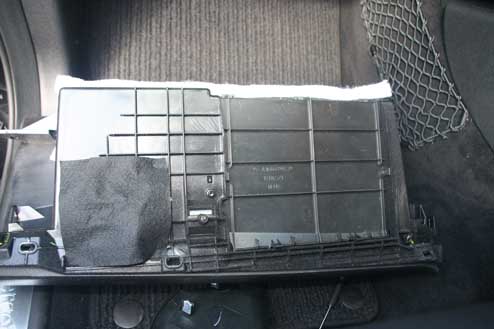
Now pull the glovebox down from the top edge and slide out. You will have to disconnect the power lead for the light, it just slides out, and make sure the AUX lead drops out properly rather than damaging the cable. The picture of the removed glovebox below shows a car without a CD changer, otherwise the black plastic panel on the right of it will not be there.
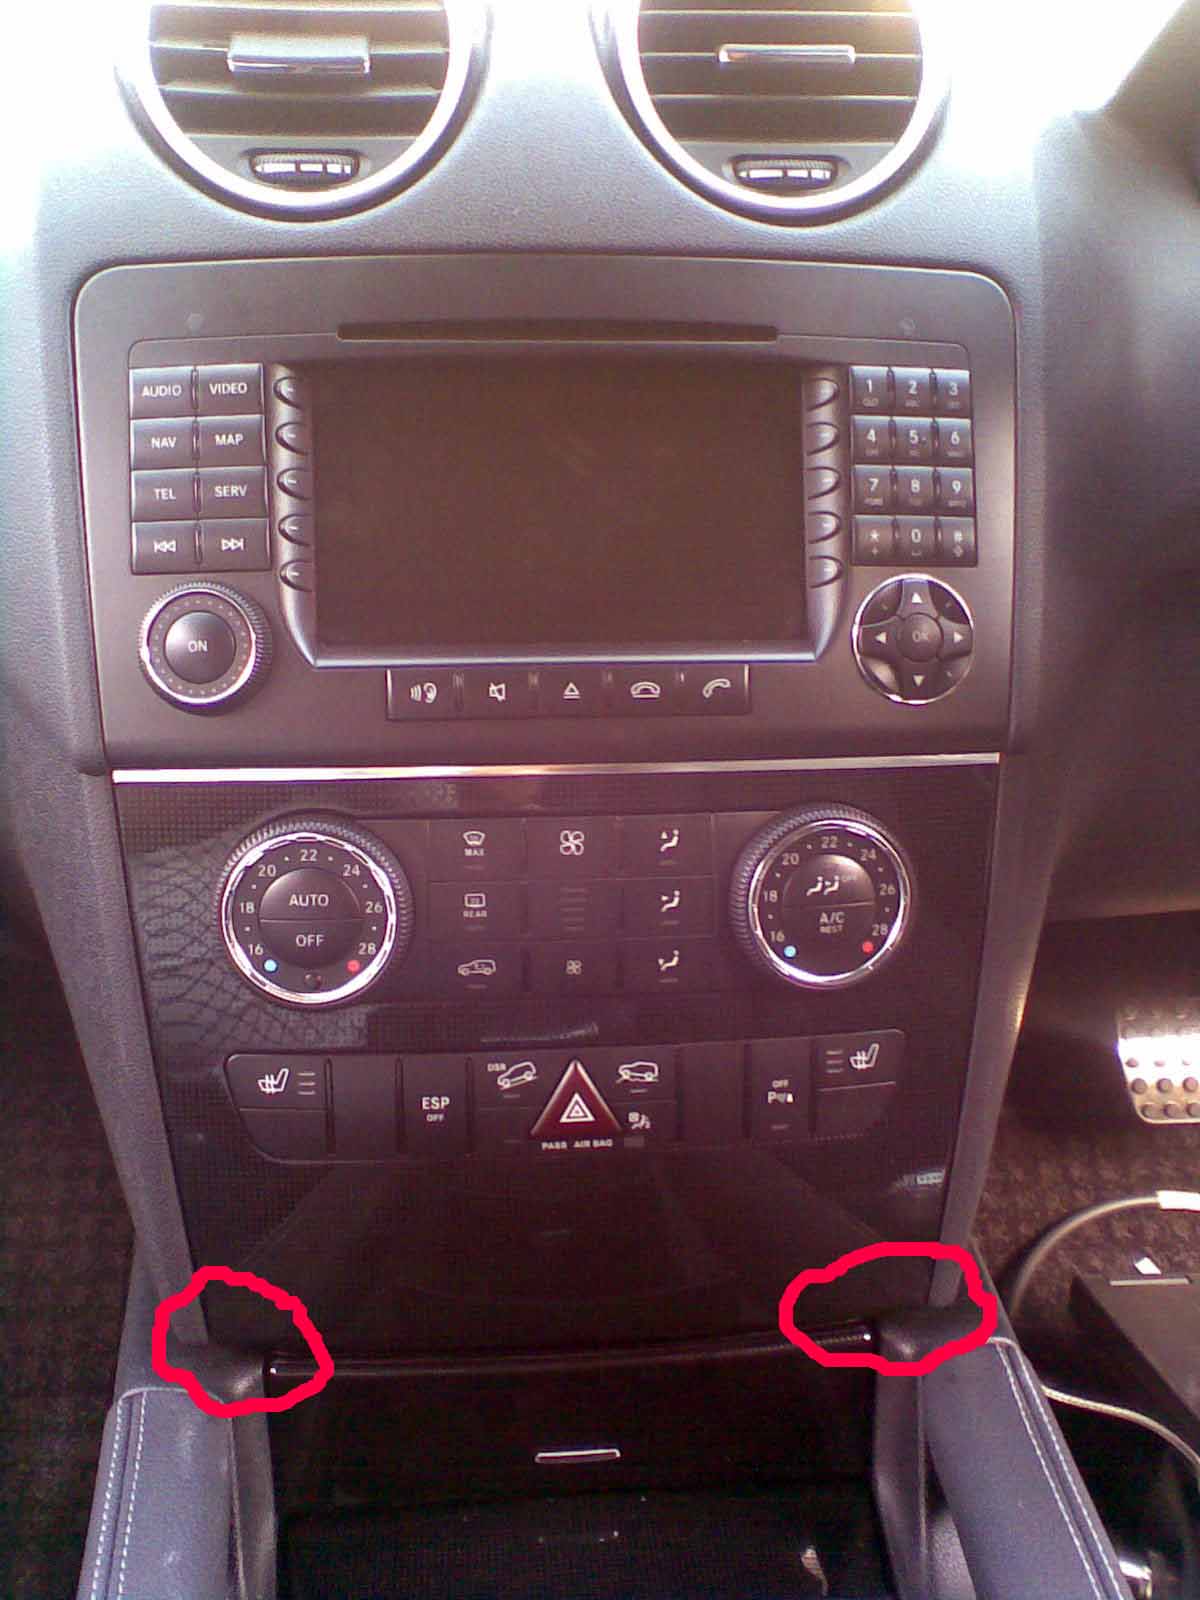
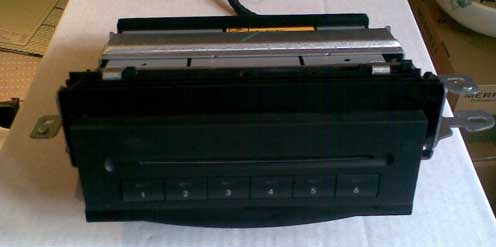
2) Remove Audio Head Unit This is a quick guide to removing & re-installing the COMAND or Audio head unit in the ML (new, W164) or GL. This is a very simple process ! Firstly remove the whole panel below COMAND with the aircon and other buttons - this is done by opening the ash-tray, and putting 2 fingers below the panel on each side, pushing upward to release the latches and pulling hard. Here is a picture showing where you are pulling once the ashtray is open.
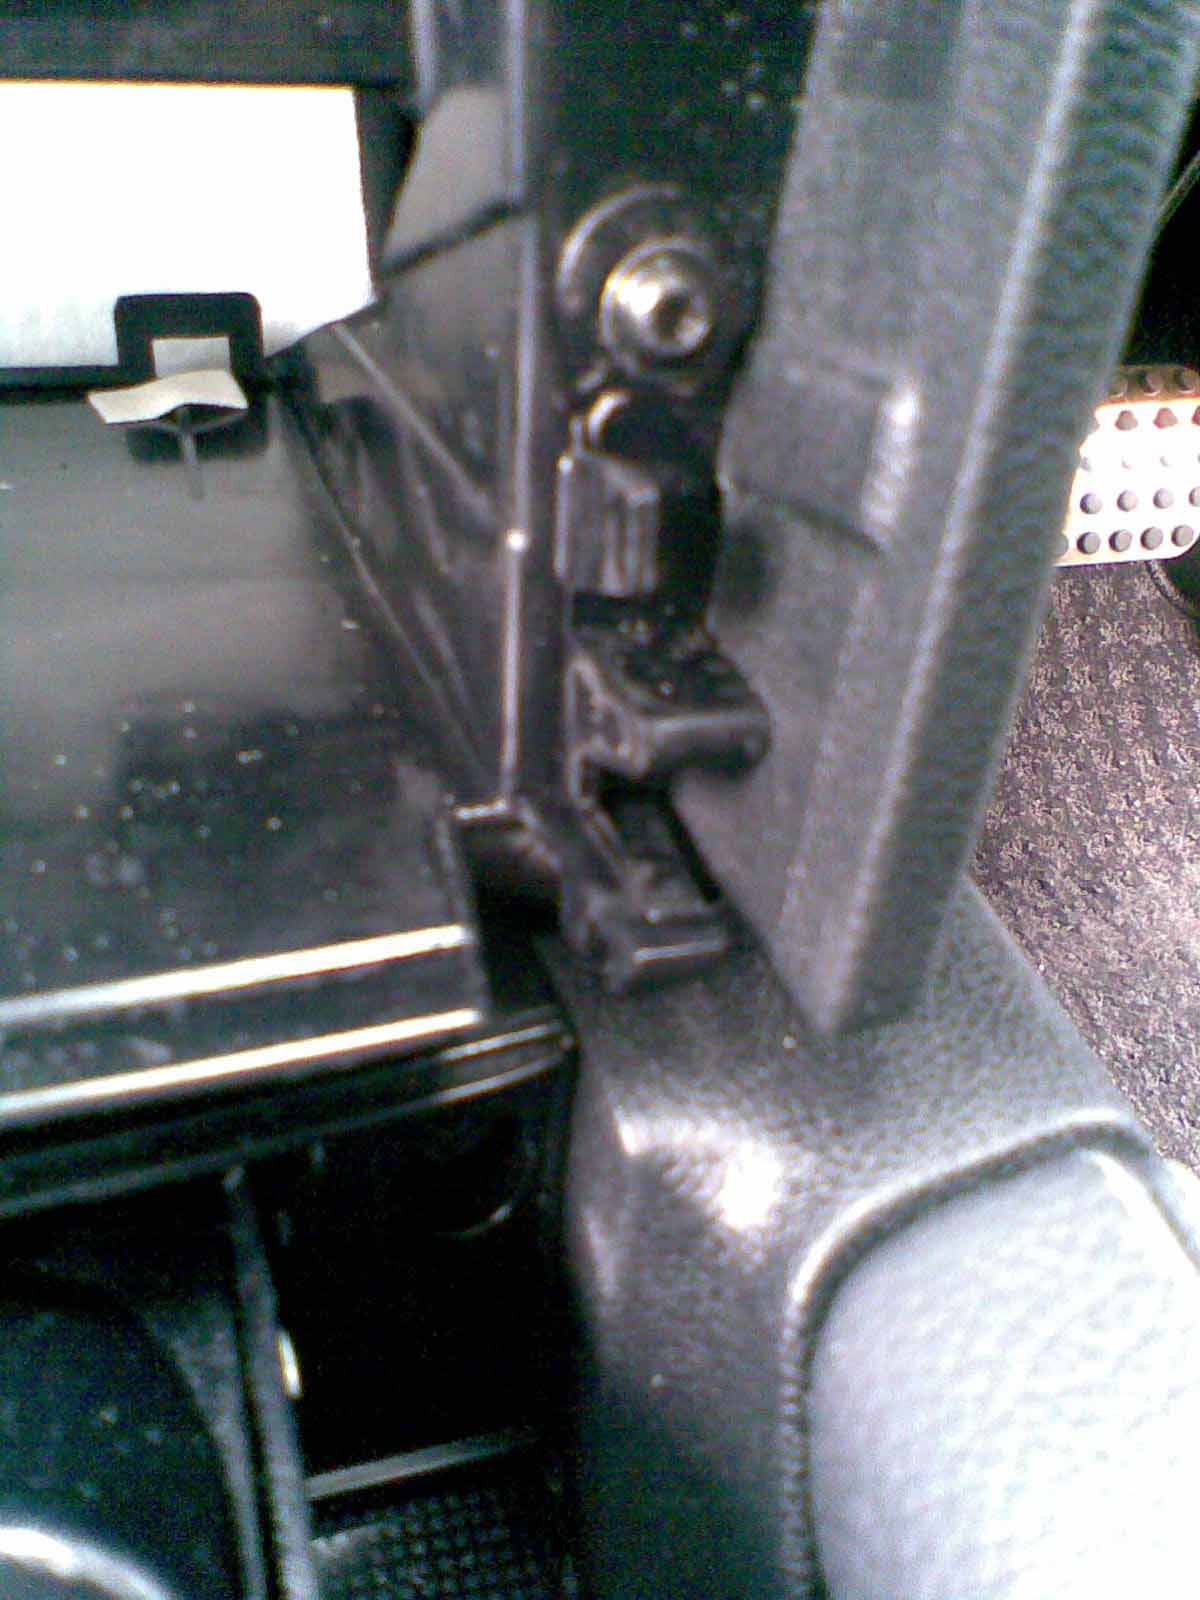
The picture below shows one of the latches that your fingers are pushing upwards - there is one at each side
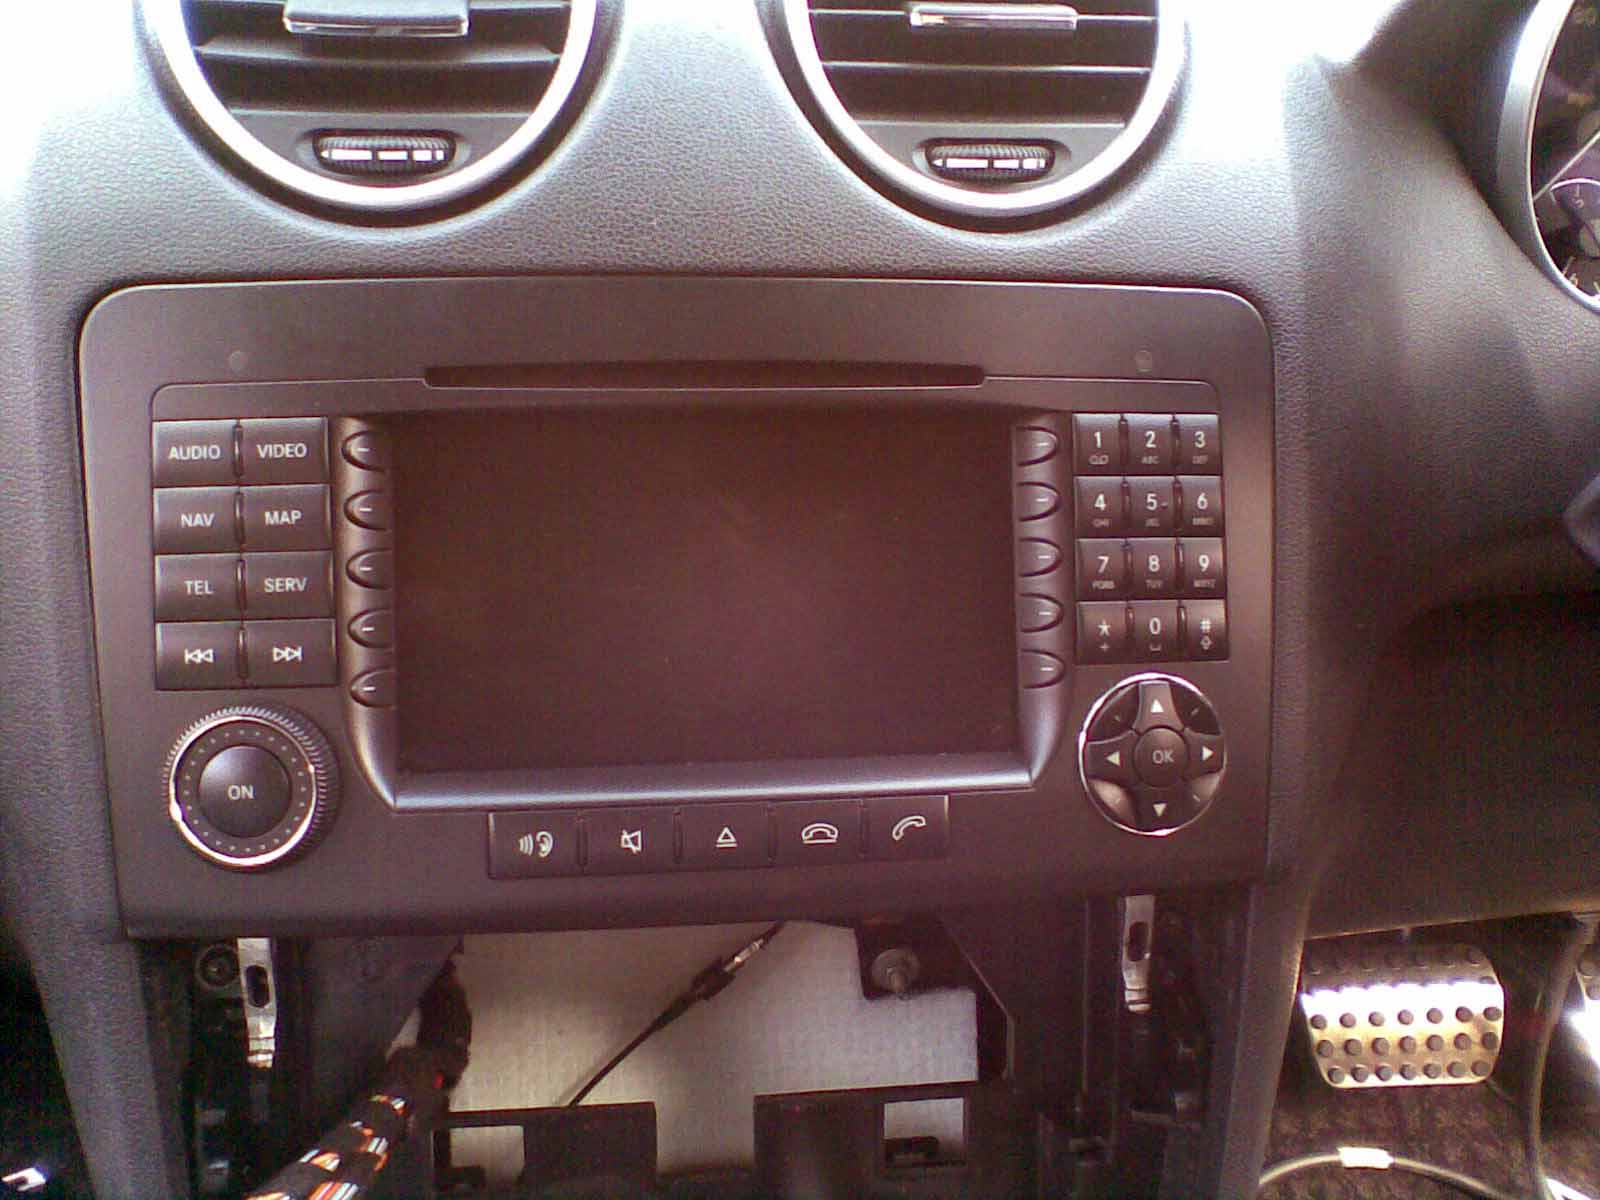
You then see two silver bars below the audio head unit - remove the 2 TORX screws, silde them downward, and then you can remove the head unit. Here is a picture with the screws removed and the locking bars moved downward.
Install is reverse of removal !
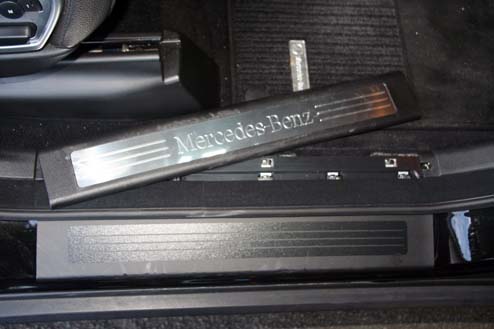
3) Remove kick panel You ONLY need to remove the kick panel if your car has Phone, TV, Sound-System, or Satellite-Radio. Pull up the door sill with 'Mercedes Benz' written on it.
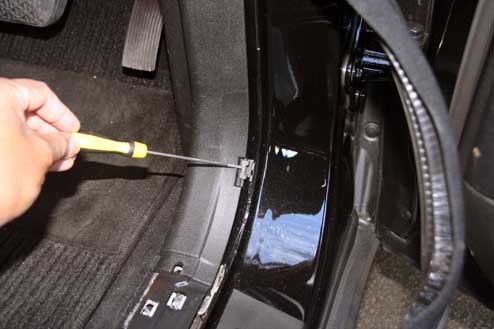
Remove the 3 screws holding the panel above the right hand side footwell Pull off the door rubber and unclip the clips holding the front edge of the kick panel in place with a small flat screwdriver, and pull out - theres a clip in the middle that unclips as you pull.
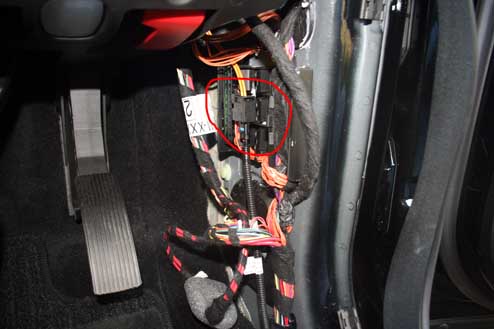
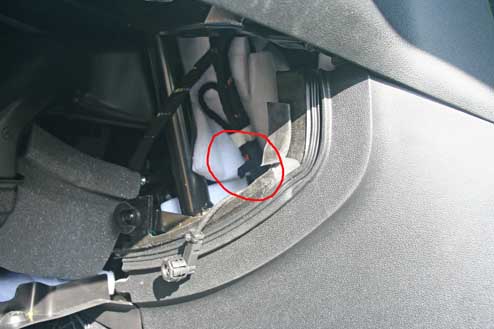
Here you will see the body fibre optic connector connecting the fibre optics from the systems mentioned above which are in the rear of the vehicle to the head unit and CD changer. This picture of the body fibre connector is from a right hand drive, but its in exactly the same place on left hand drive vehicles (i.e. on right hand side of vehicle)
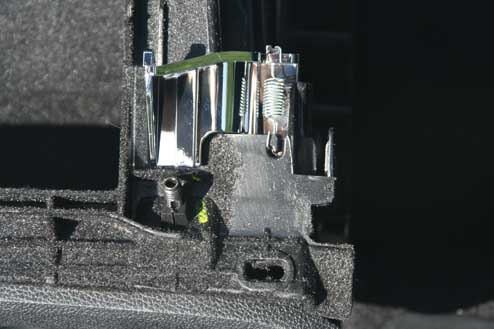
4) Install glovebox parts Remove the pop out cover for the CDC release button, and insert CDC release button and attach spring as shown in photo below. Remove the plastic cover where the CDC will now drop through Here is a picture of the button installed, note the spring position.
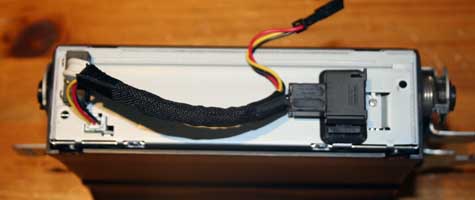
On the R class install the partition panel. 5) Install CD changer Screw the CD changer into the bracket using the 4 screws. Remember that the bracket has grease on the springs and you don't want that all over the CD changer. Attach the plastic wiring harness holder to the CD changer and clip the optical fibre cable into it to hold it still. The picture below shows this done on a left hand drive bracket.
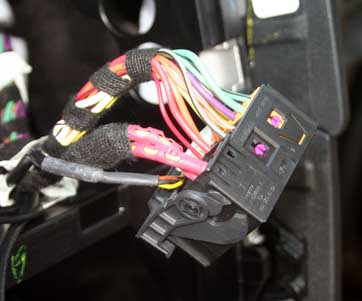
And here is a picture of the rear showing the cable clip installed and fibre loom connector attached to it.
Now connect up the power loom which is taped to the loom near the side of the audio head unit, and the fibre optc loom (cable labelled CDC). You will have to remove the dust cover from the end of fibre optic loom before you can plug it into the CD changer fibre connector.
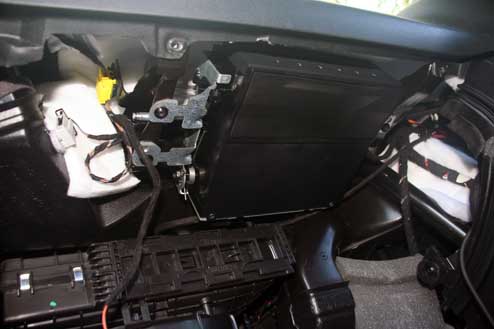
Now screw unit in place under dash - here is a photo showing where it goes.
6) MOST fibre install If you do not have any control units in the rear of the car then plug the other end of the CDC fibre optic into the outer fibre optic 'hole' in the head unit connector. (Dont forget to remove the little dustcaps from the plug first !)
If you do have other units, there will be a 3rd connector on the fibre optic loom which needs to be routed through to the right hand kick panel and plug into the body fibre connector. Remove the existing plug, cover it with the dust-cover removed from the new fibre, and tape it and the new loom to other wiring looms so they do not rattle. Replace the fibre in the head unit connector with the one from the new loom (marked HU), and again tape the old fibre safely away, covering the end to protect it with the 2 little caps removed from the new fibre cable's HU connector. 7) Re-assembly Is the reverse of dismantly, Remember one of the top glovebox screws is same as the screws under the dash and not the other 2 top glovebox screws. I removed the green clip that held the middle of the outside kick panel in place. Don't forget to put the AUX input cable back in, and connect the glovebox light again. 8) Coding The dealer needs to run through the 'Retrofit MOST components' procedure in the head unit using Star Diagnosis in order to code the COMAND system so it knows about the CD changer and does not log faults. If you have phone, TV, Satellite Radio or sound system, it may work without coding - but you should have it coded at the next service. If you did not have TV, Phone, Satellite Radio or sound system in your car, you may need to remind the dealer that they have to hand configure the components on the fibre optic ring setting page as AGW, CDC, COMAND - using the 'set actual values to current values' facility will not work as the fibre ring has been internally looped, so the unit can not see the new items on the ring. The head unit may also need to have it's fuse removed and re-inserted to accept that particular change. Note also that the CDC menu will not appear on COMAND unless there is a CD in the changer, or it is loading/ejecting disks. |
If you found this information useful, please support the site by making a donation via Paypal. Any amount at all helps me improve the information on the site. |
Comand Online Ltd - the place to buy Mercedes iPod kits, phone kits, retrofit parts & map disks MY AUTOCAR - THE BEST PLACE TO TALK CARS |